
Calculator data extraction
Method 1: URL GET Parameters
Section titled “Method 1: URL GET Parameters”This method will append parameters to the URL of your Call To Action URL. That is, when the user clicks the CTA button (which might say something like “Get Quote” or “Book Now” depending on how you have set it up), the user will be redirected to the CTA URL that you set, with the GET parameters appended.
To set this up:
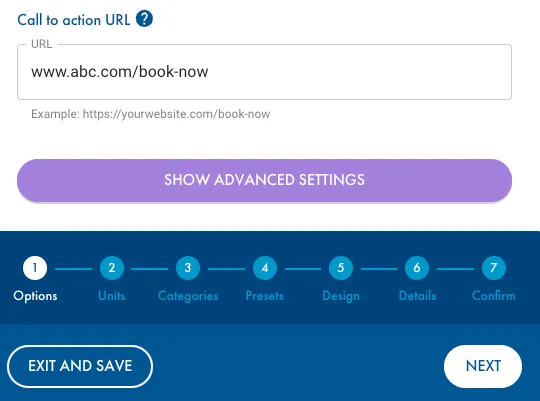
- Login, open your desired calculator, and click “SHOW ADVANCED SETTING”:
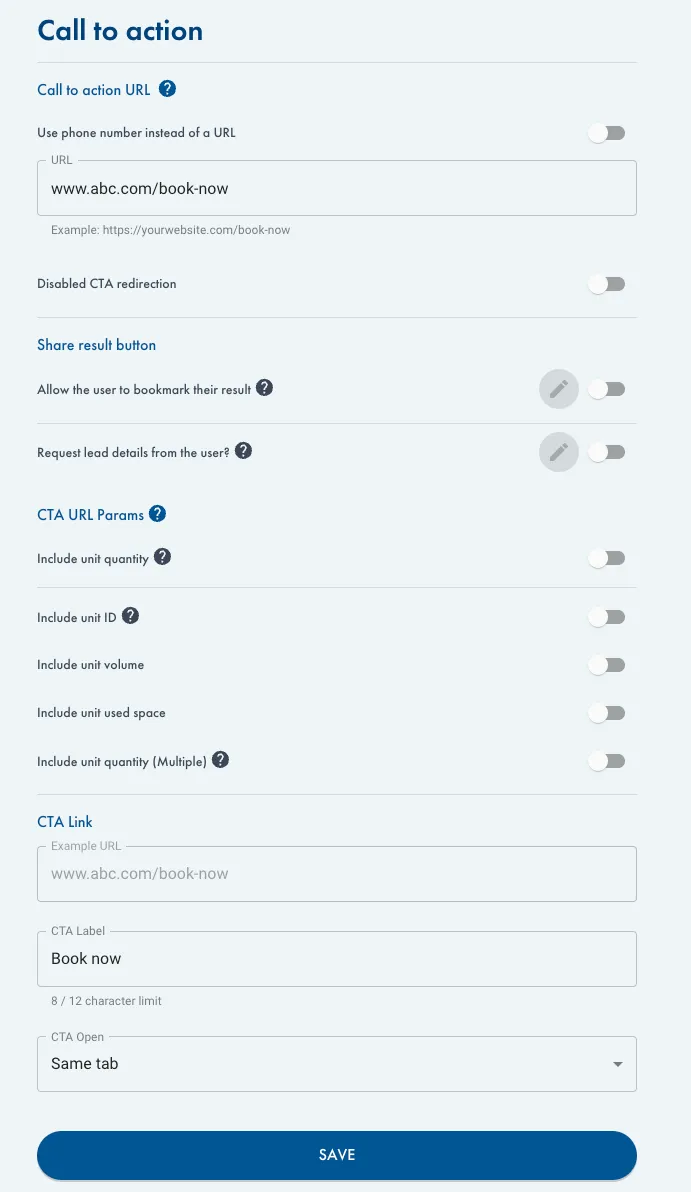
- Within the Advanced Settings screen, select the CRA URL Params that you want to be appended, and set your CTA Link. This is what the screen looks like:
-
If your CTA URL has all the parameters appended, it will use this syntax:
www.abc.com/book-now?cm-qty={qty}\&cm-id={id}\&cm-volume={totalVolume}\&cm-used-volume={usedVolume}
Method 2: Subscribe to the Calculator event
Section titled “Method 2: Subscribe to the Calculator event”The calculator also fires an event that advanced customers can use to gain better control, access the data from the calculator, and tell the website what to do next.
To use this method:
- Login, open your desired calculator, and click “SHOW ADVANCED SETTING”:
- With the Advanced Settings, turn on “Disable CTA Redirection”. This will prevent Calcumate from auto-redirecting to any CTA URLs, and instead hand control to your website after the Calcumate ‘Booking’ Javascript event fires.
- Listen to the following event:
window.addEventListener('Booking', (event) => { console.log(event);
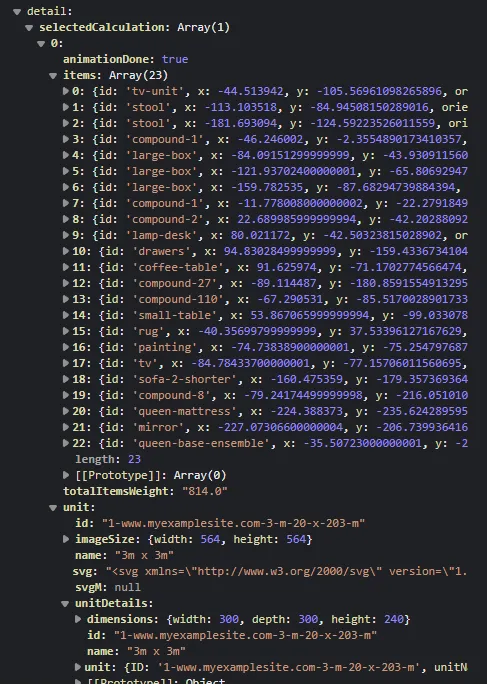
});- The event object contains all the detail of the calculation. Example:
- You can write code to tell your website what to do next. For example, you can use the data from the Booking event to determine where to send the user to next (and potentially pre-fill certain details such as the unit type the user requires).