Calculator setup and customisation
Step 1 - Initial set-up
Section titled “Step 1 - Initial set-up”- Start by naming your new calculator.
- Add your website domain. Note, you can add 2 domains i.e. one for testing and one for your primary domain.
- Select your chosen language. If we don’t have your chosen language please contact us here.
- Select the storage type that best suits your business. If you offer multiple services you can make a new calculator later.
- Choose the measurement system and turn on/off the ‘measurements and dials’ based on your preferences.
- Add your ‘call to action URL’ (CTA). This is the URL link on the button displayed on the calculation result. This will take your customer directly to your chosen landing page (i.e. contact form or booking page).
Call to action URL
Section titled “Call to action URL”The call to action URL can be set:
- As a default for all URLs on the calculator
- Per storage unit type
To change the default call to action URL for the calculator, login, select the calculator you would like to edit, and update the “Call to action URL field”:
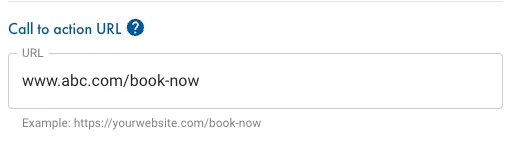
To change the call to action URL for individual storage unit types, login, click into the individual storage unit, and edit the “URL to reserve” field:

Call to action (advanced settings)
Section titled “Call to action (advanced settings)”To change the default call to action URL for the calculator, login, select the calculator you would like to edit, and update the “Call to action URL field”.
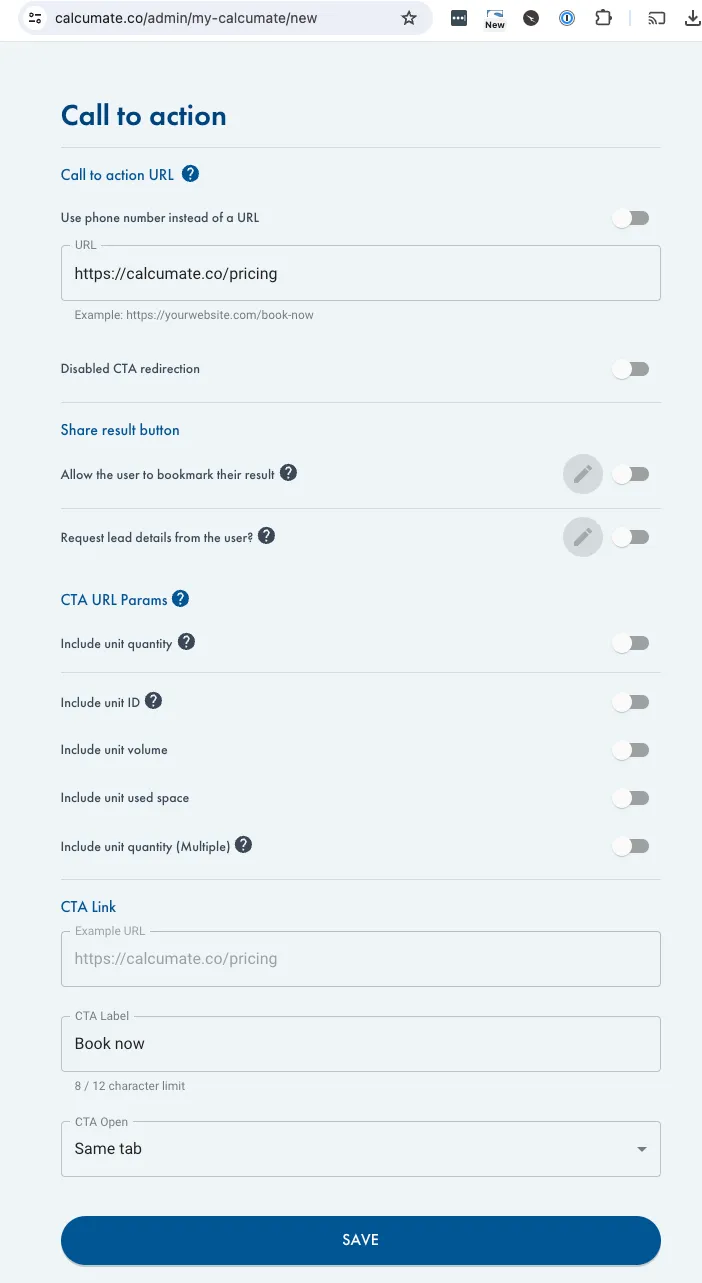
After you have set the Call to action URL, you can click “SHOW ADVANCED SETTINGS” to edit/enable the following:
-
Allow the user to bookmark their result.
- This will ask for the user’s name, email and phone number, before providing them with a link to the calculator that has the items they added saved. Note: So we don’t ask for their lead details twice, turning on this option will disable ‘Request lead details’.
-
Request lead details from the user.
- Before sending them to your chosen call to action URL, we’ll ask for their name, email and phone number. This will be automatically emailed to you as they proceed to the next page. Note: This option is disabled if you switch on the ‘bookmark results’ feature.
-
Turn on CTA URL Params to append unit information to the CTA URL.
The following information can be appended:
- Unit quantity
- This is for when you have one size of unit and the calculator recommends how many the user needs.
- Unit ID
- This is when you have multiple unit sizes and the calculator recommends one set of dimensions.
- Unit Volume
- Unit Used Space
- Unit Quantity (Multiple)
- Allow to include unit ID and quantity into Booking URL. Pattern: {Unit ID}={Unit Quantity}
- Unit quantity
-
The CTA Link
- The URL where the customer will be taken after they finish using the calculator. (eg. your quote or booking page)
-
The CTA Label
- The words on the button which the user presses when they have finished using the calculator (eg. GET QUOTE)
-
Whether the CTA opens in the same tab or a new tab
The screen that allows the above to be selected looks like this:
Step 2 - Adding unit sizes
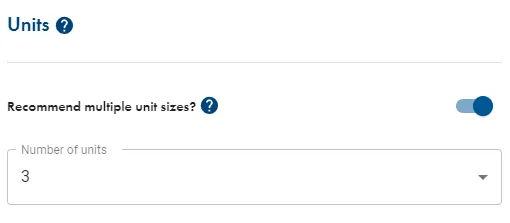
Section titled “Step 2 - Adding unit sizes”- You can toggle the ability for your calculator to provide 1, 2 or 3 unit sizes. Enabling multiple results will provide your client with more visual understanding on what each unit size can offer.
- To modify the unit size/name/description or direct call to action URL click the pencil icon and change as required. If you no longer want this size to be offered simply delete by using the bin icon.

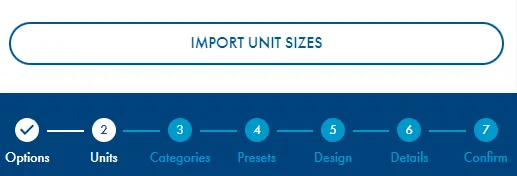
- You can manually add each of your storage unit sizes by using the ‘add unit’ button or you can mass upload by following the ‘import unit sizes’ button.
Step 3 - Categories
Section titled “Step 3 - Categories”Categories is where you can create go to tabs for your clients to use when selecting their items. You can add/remove items from each category as well as rename them based on your preferences.
-
Display search function will enable a free text search where the client can search a key word to find the relevant item.
-
Add/delete categories, you can have up to 6 categories.
-
Edit your chosen category by clicking the ‘edit’ (pencil) icon.

-
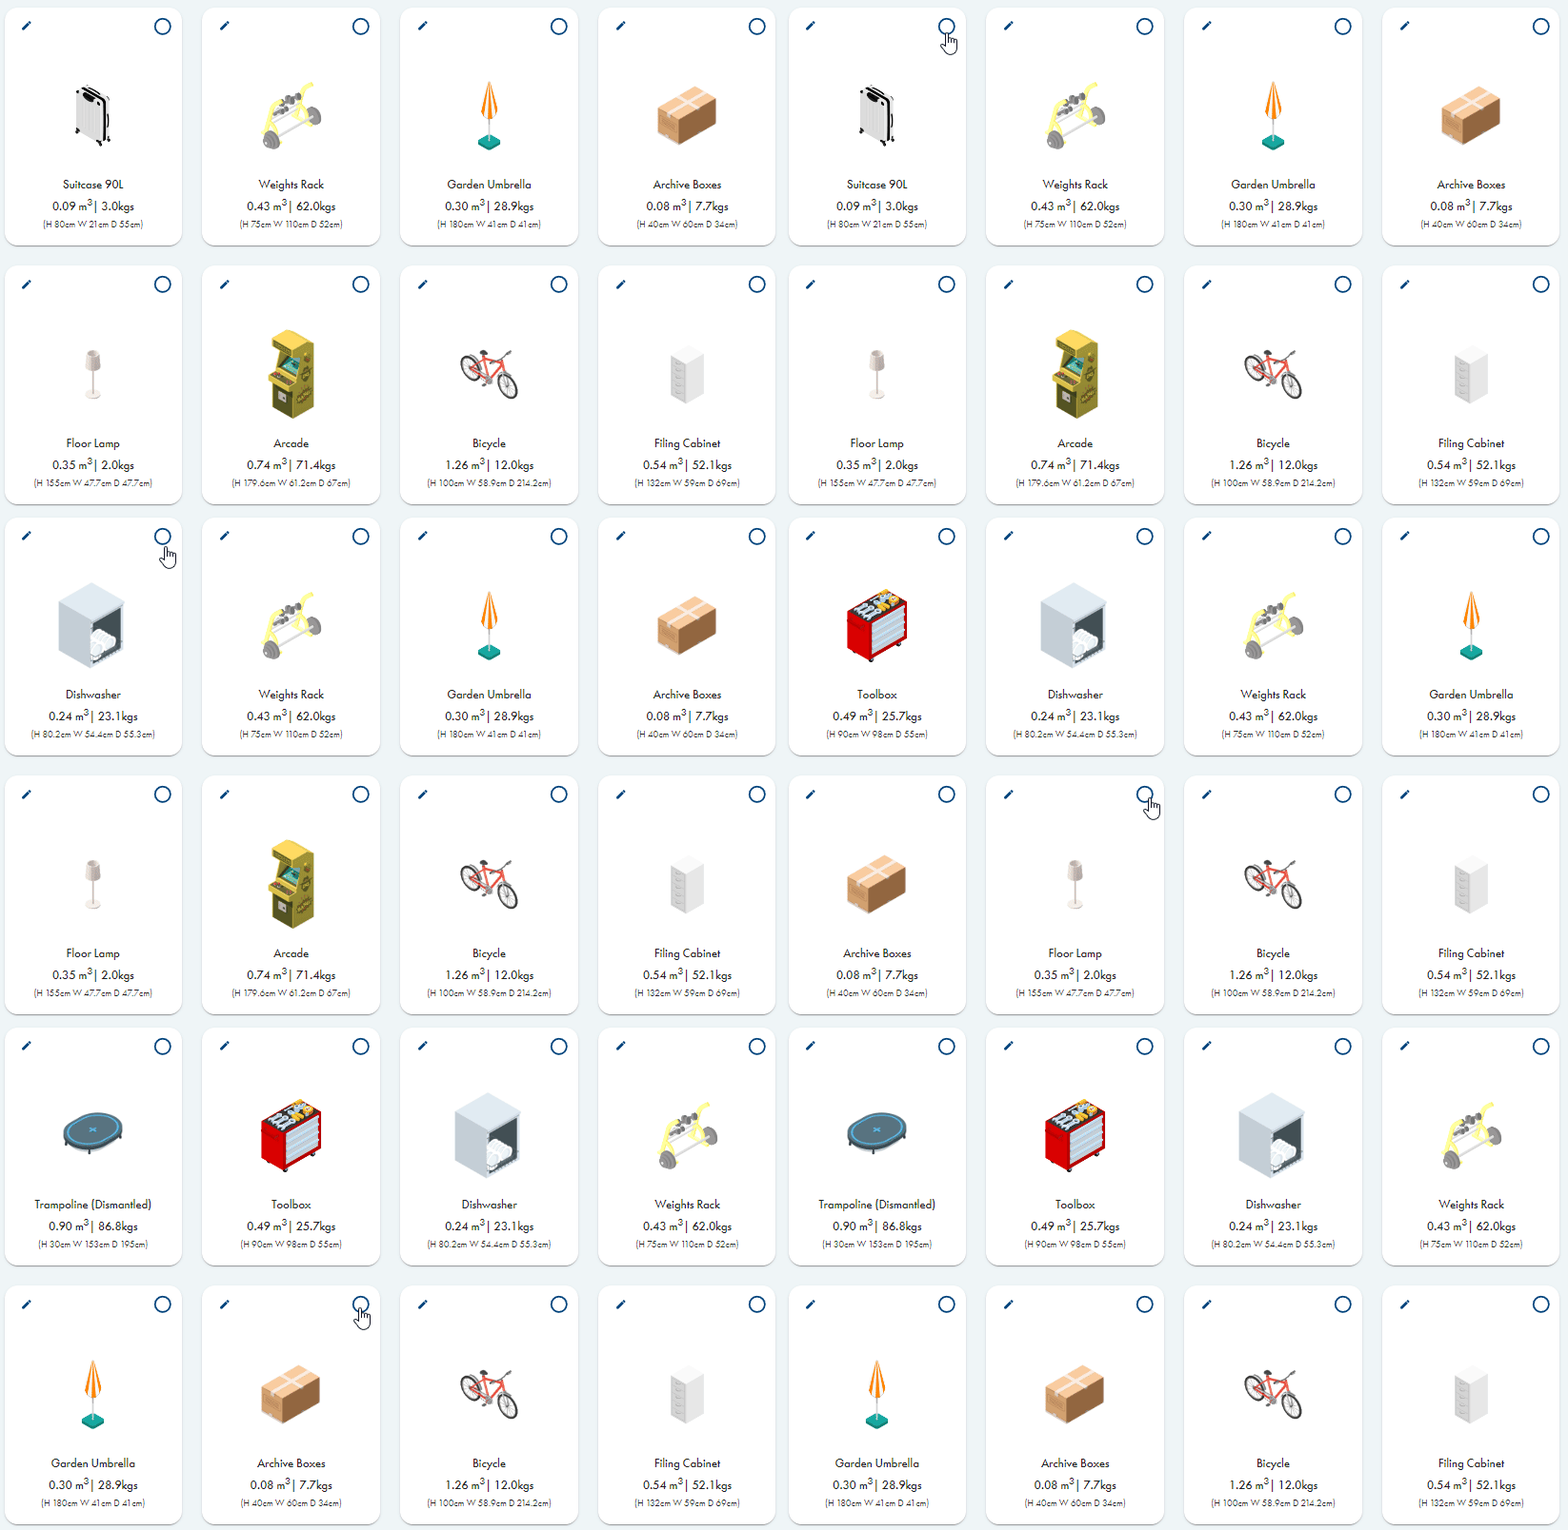
To add items to your category, tick the circle and the item will be moved to your active item list (blue shaded background). To remove the item from the category untick the circle.
-
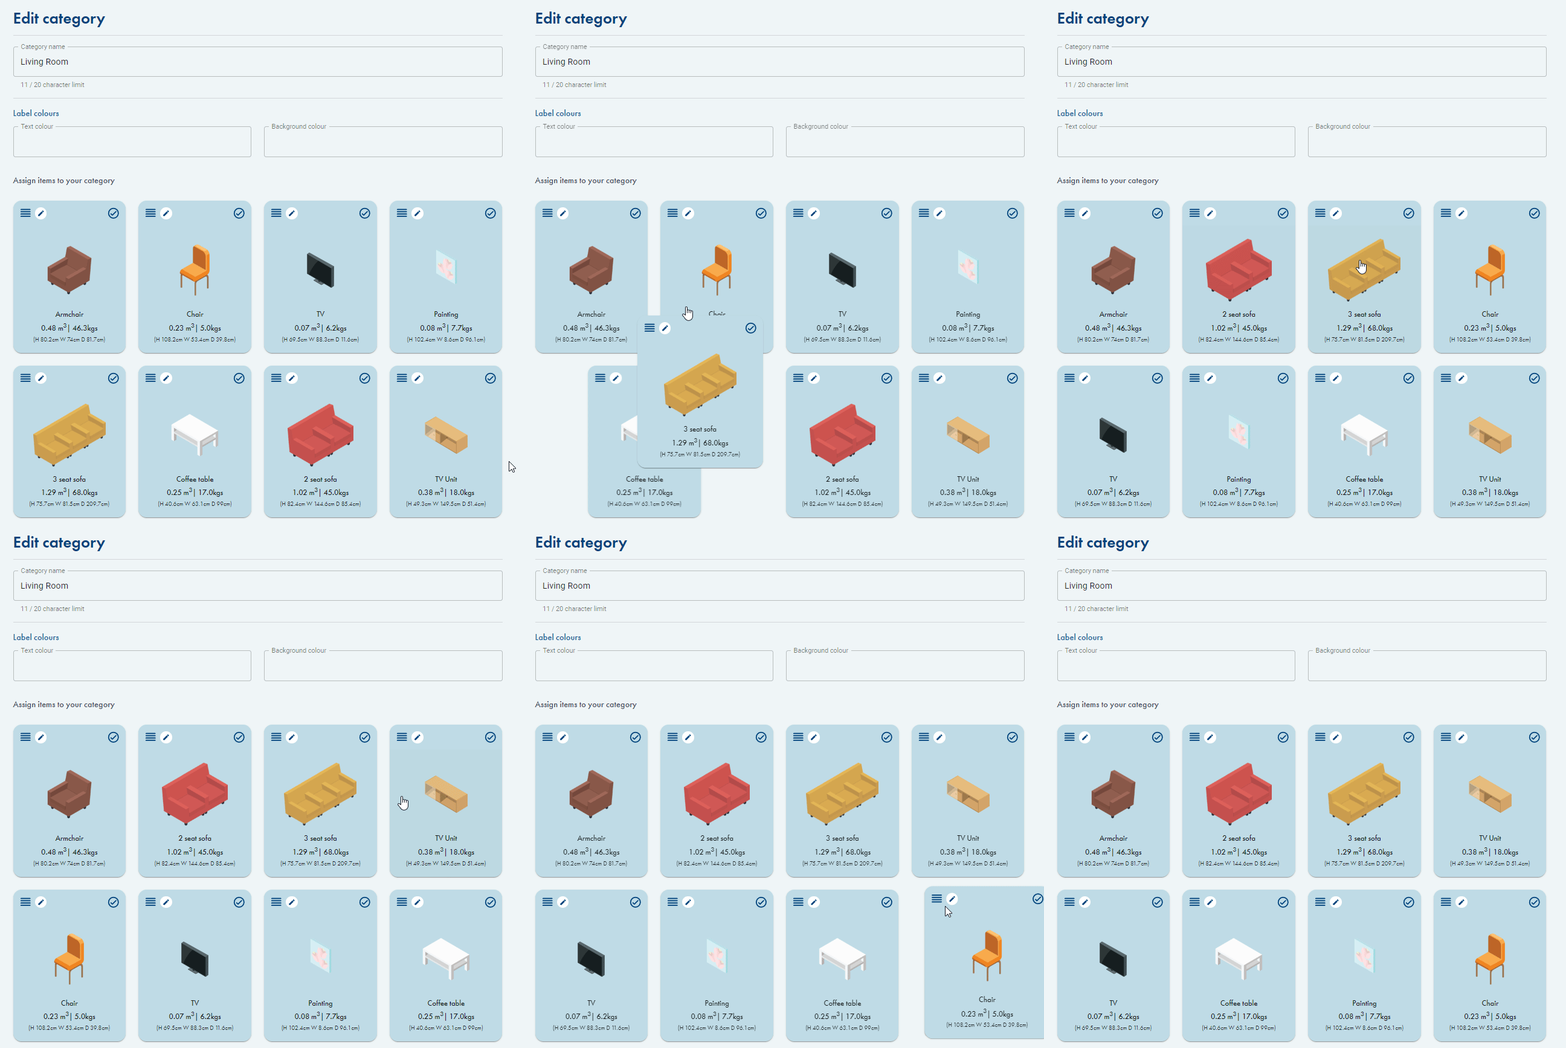
Re-arrange the items as you feel best. Don’t forget to press save when done (top right of the screen).\
-
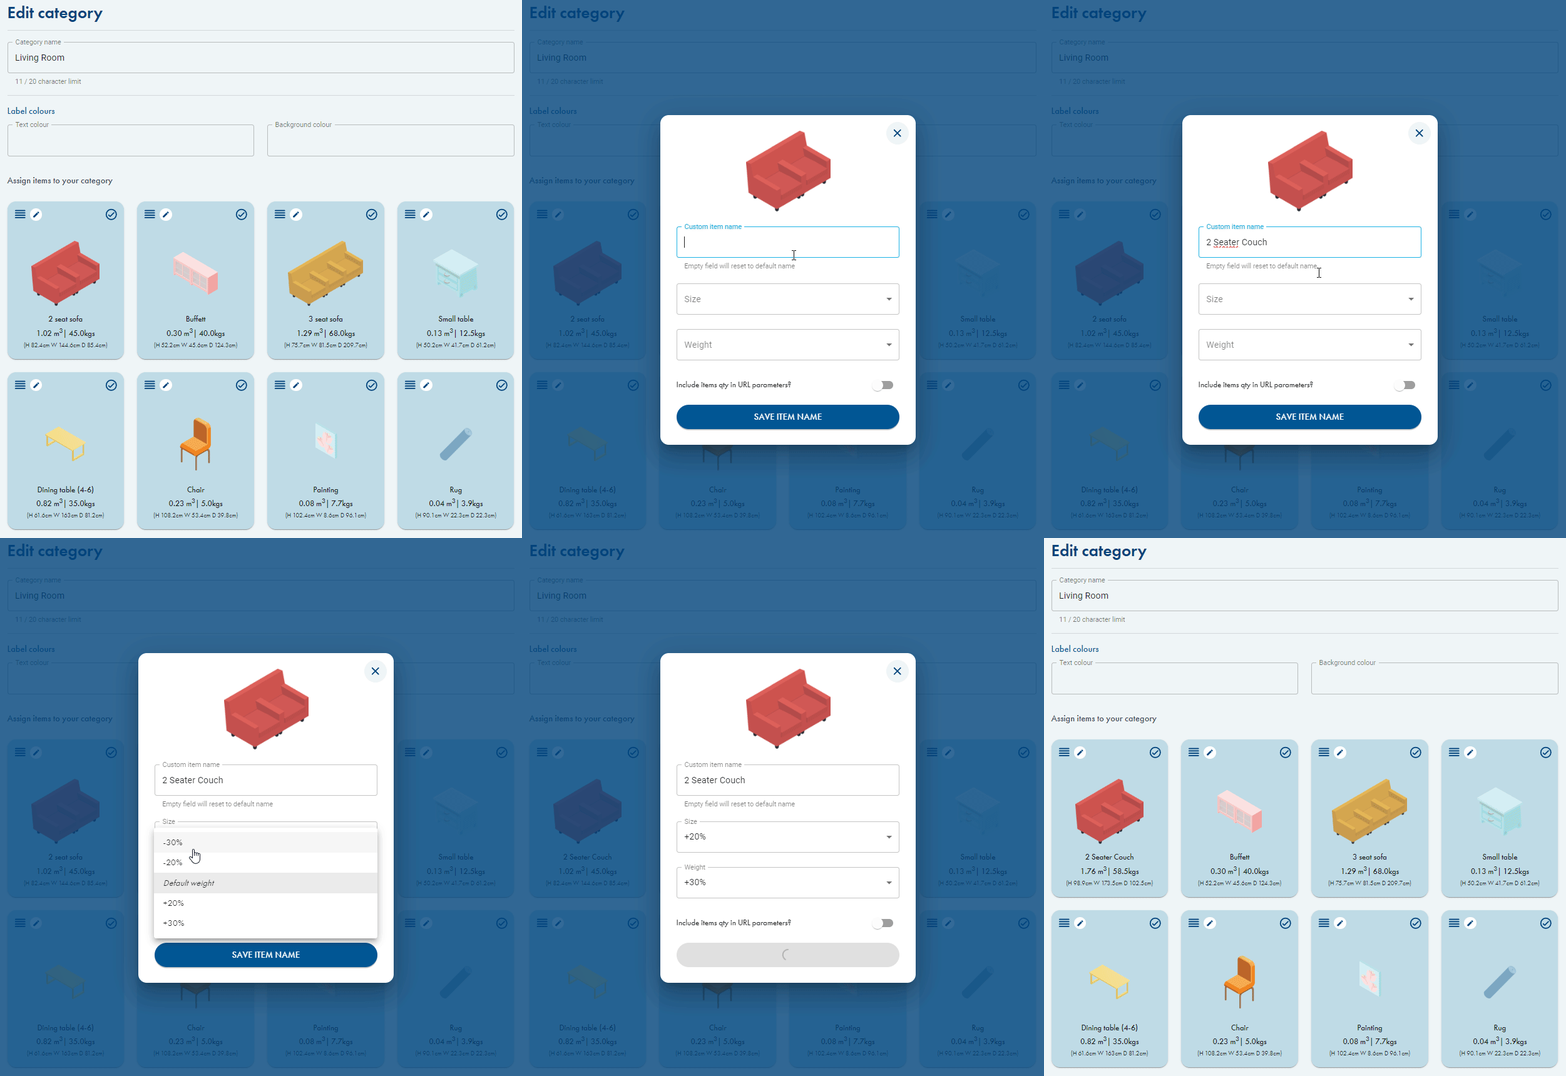
Customise your item name/size/weight. Click the customise icon and you can then modify the size/weight of the item by +/- 30%, and change the name of the item.
-
Step 4 - Presets
Section titled “Step 4 - Presets”Create presets so your client can get an estimate quickly. You can create 5 presets, we have already designed 5 for you, but you can modify/delete as required.
-
Toggle on/off the preset (on = blue / off = grey)

-
The preset tab will become available inline with your categories.
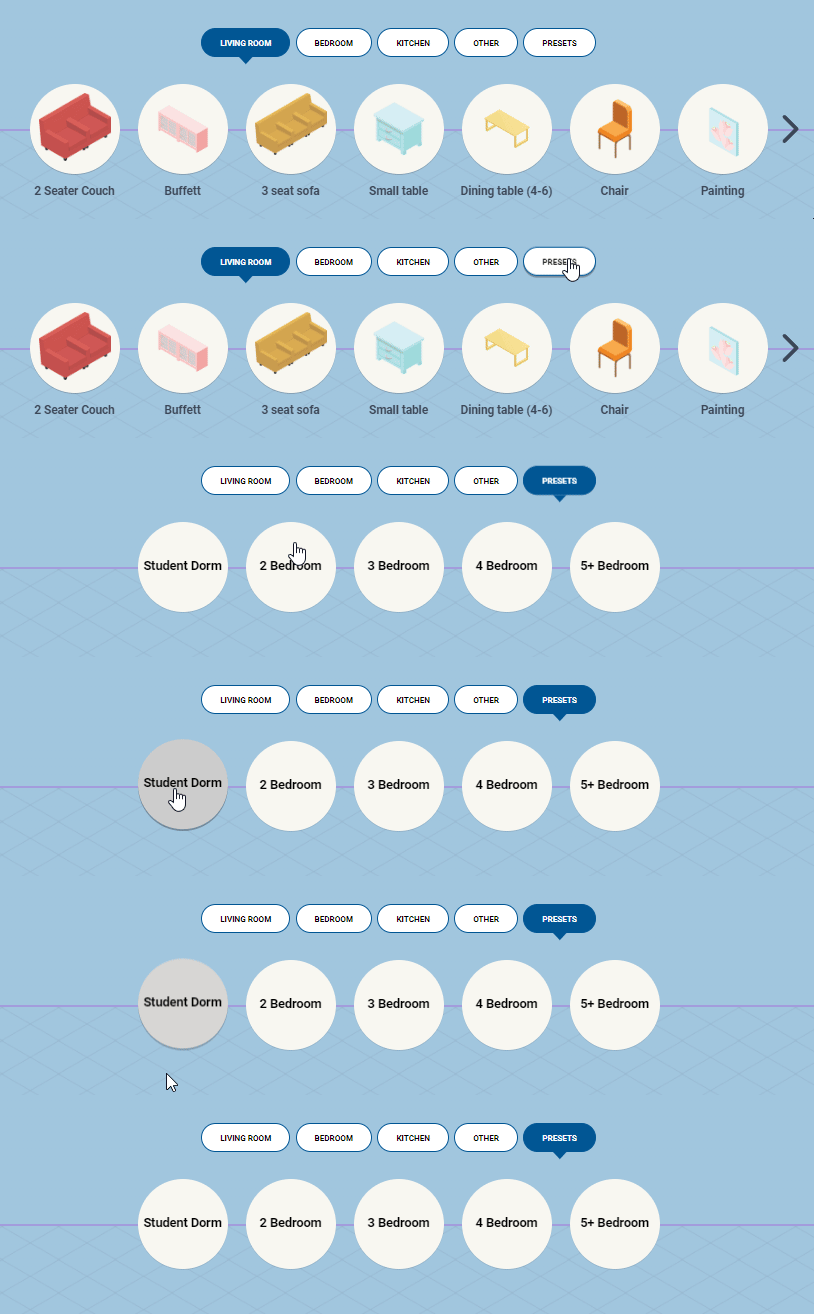
-
You can put the ‘preset’ tab on the left or right side, by editing the preset settings.
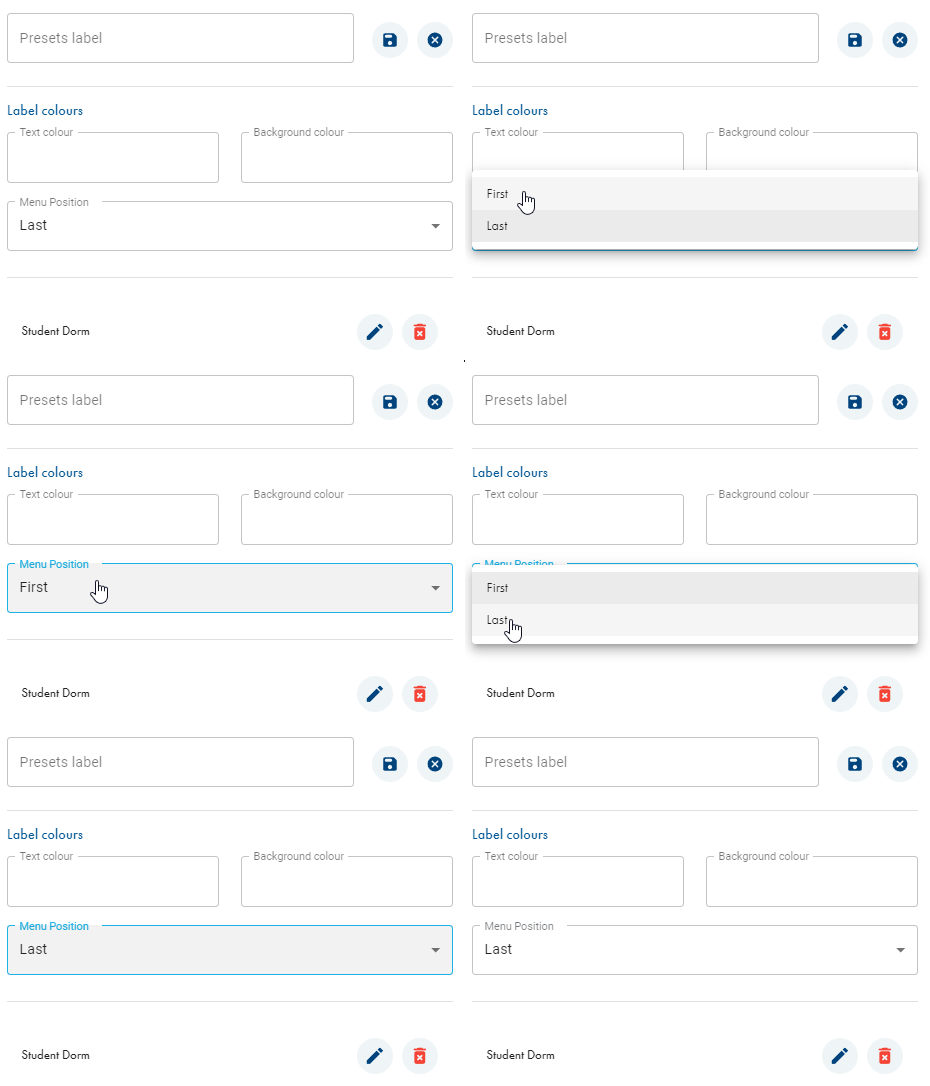
-
Use the pencil icon to customise/edit your preset.
Change the preset name and use the + and - symbols to add/remove items from your preset. Scroll down to account for all relevant items.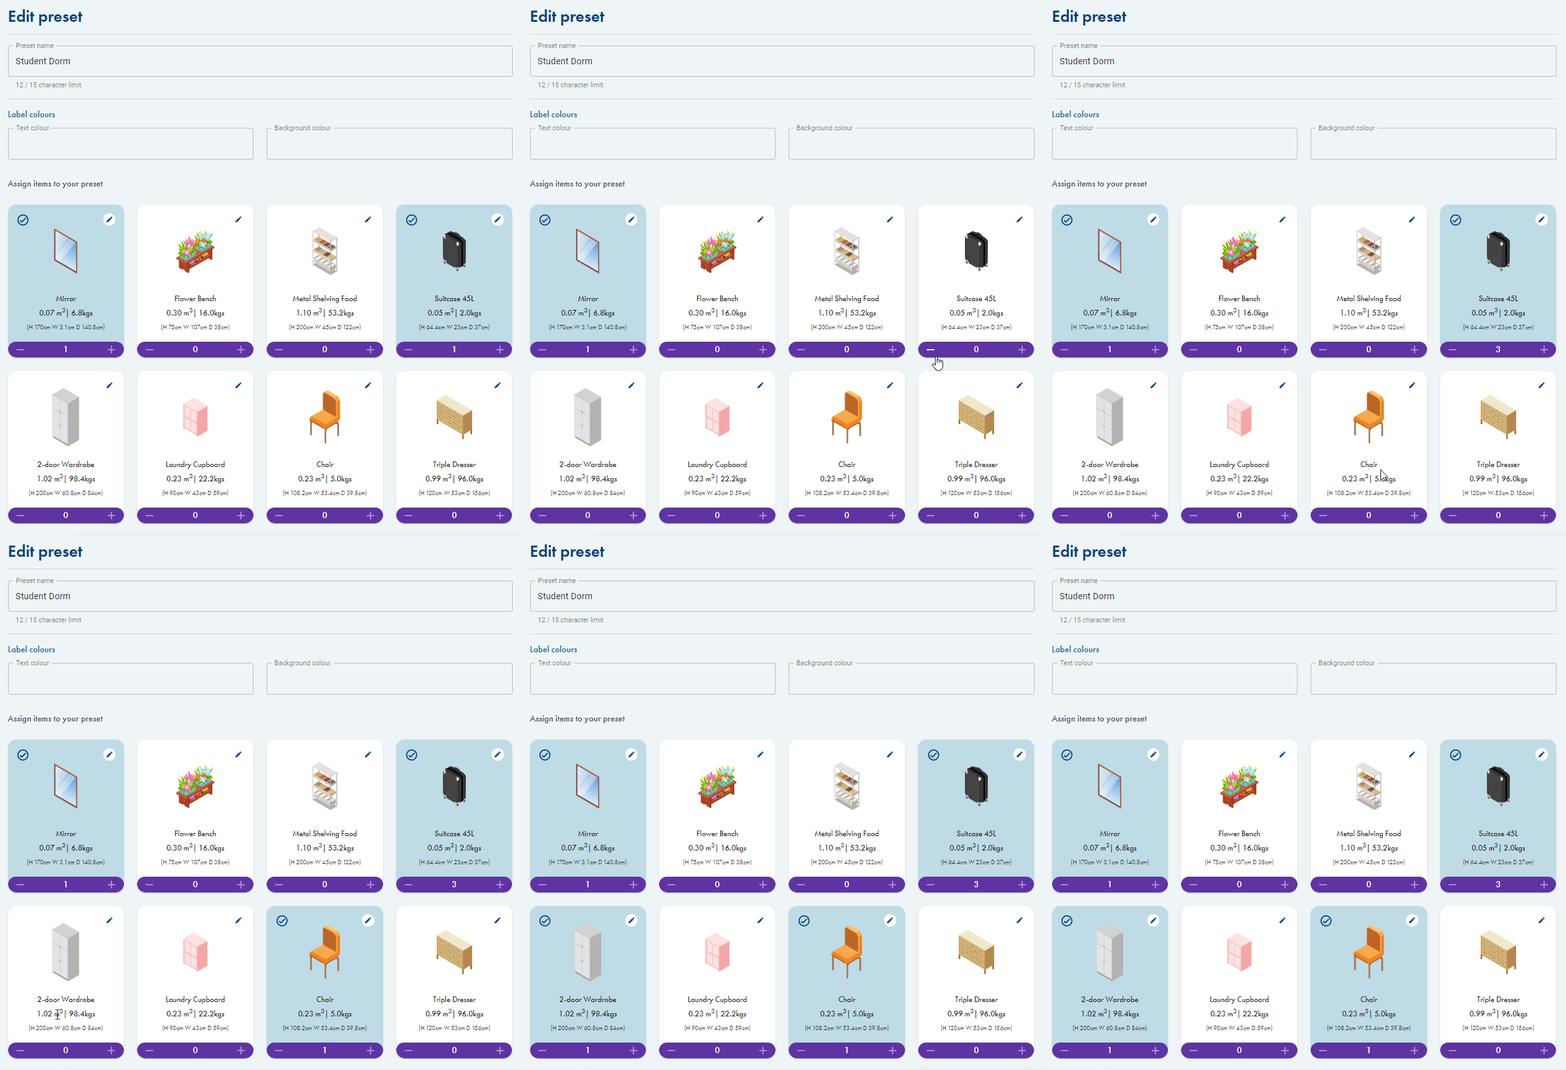
Step 5 - Design
Section titled “Step 5 - Design”The design of a calculator can be amended by creating a new calculator or logging into My Calcumate at calcumate.co/login and navigating to your Calculator Builder -> Select the appropriate integration -> Design Tab.
You are able to amend the following calculator design elements:
Branding
- Font
Intro
- Primary text
- “GET STORING” as default
- Secondary text
- “Start by adding items to your storage unit” as default
Logo
- Add your company logo to your storage unit
Unit Image
- If you would like to show a different unit type from our standard unit types. You can upload your image file.
Colour scheme
- Primary colour
- Secondary colour
- Unit colour
Background colour
- Gradient (two toned)
- Solid
- Transparent
Show Ismoetric Grid
- toggles on/off the grid background
Buttons
- Button colour on the ‘items added’ list
- Button text colour is the text colour on the ‘items added’ list
- Category button border colour
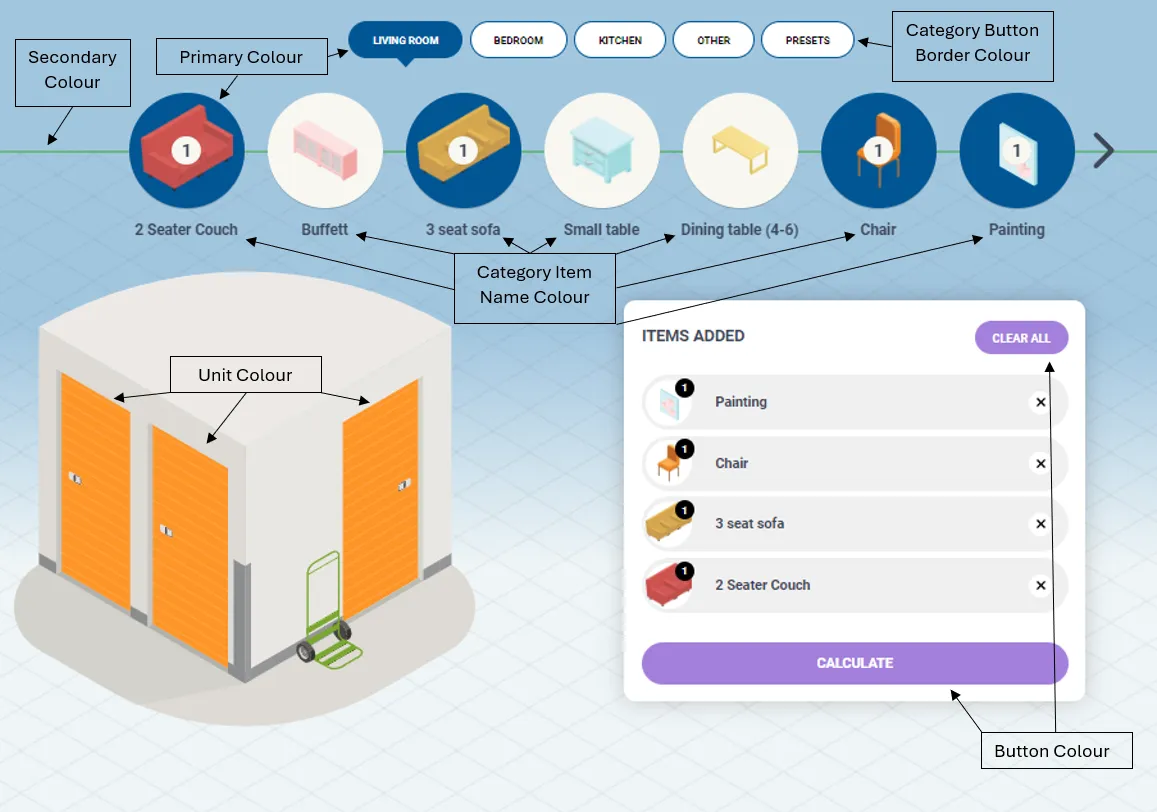
Step 6 - Details
Section titled “Step 6 - Details”In this step you can enter your billing details
Step 7 - Publish to your website
Section titled “Step 7 - Publish to your website”You have now created your calculator and ready to implement your code onto your web page.
-
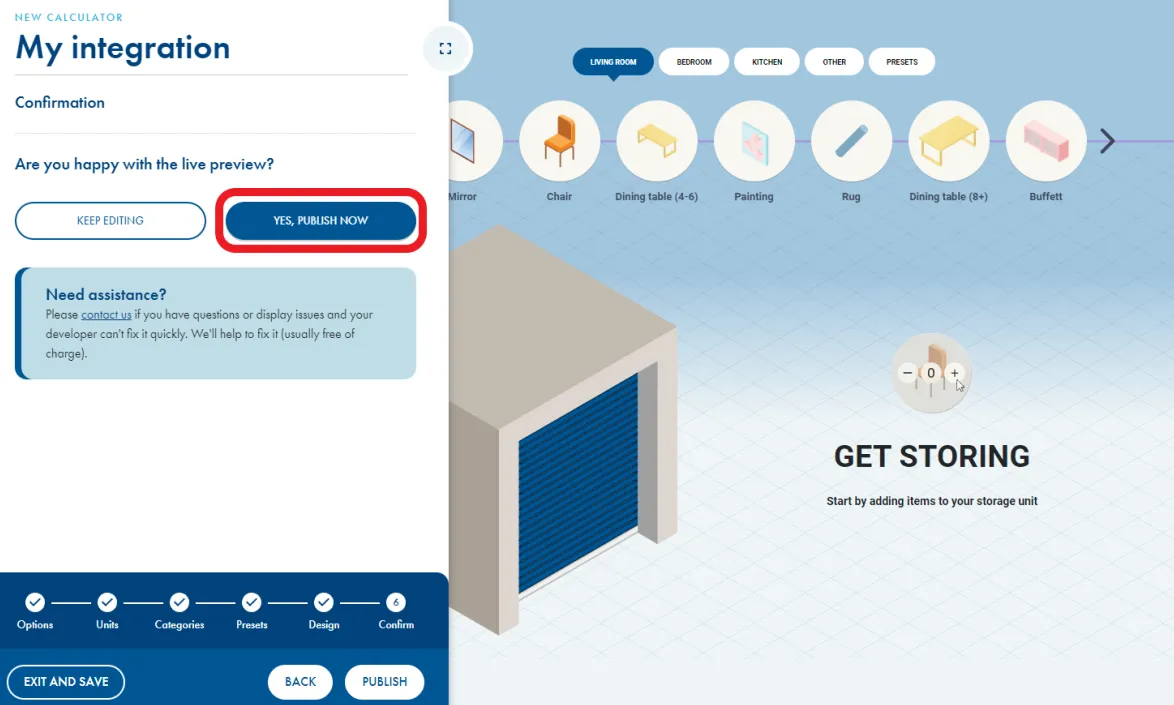
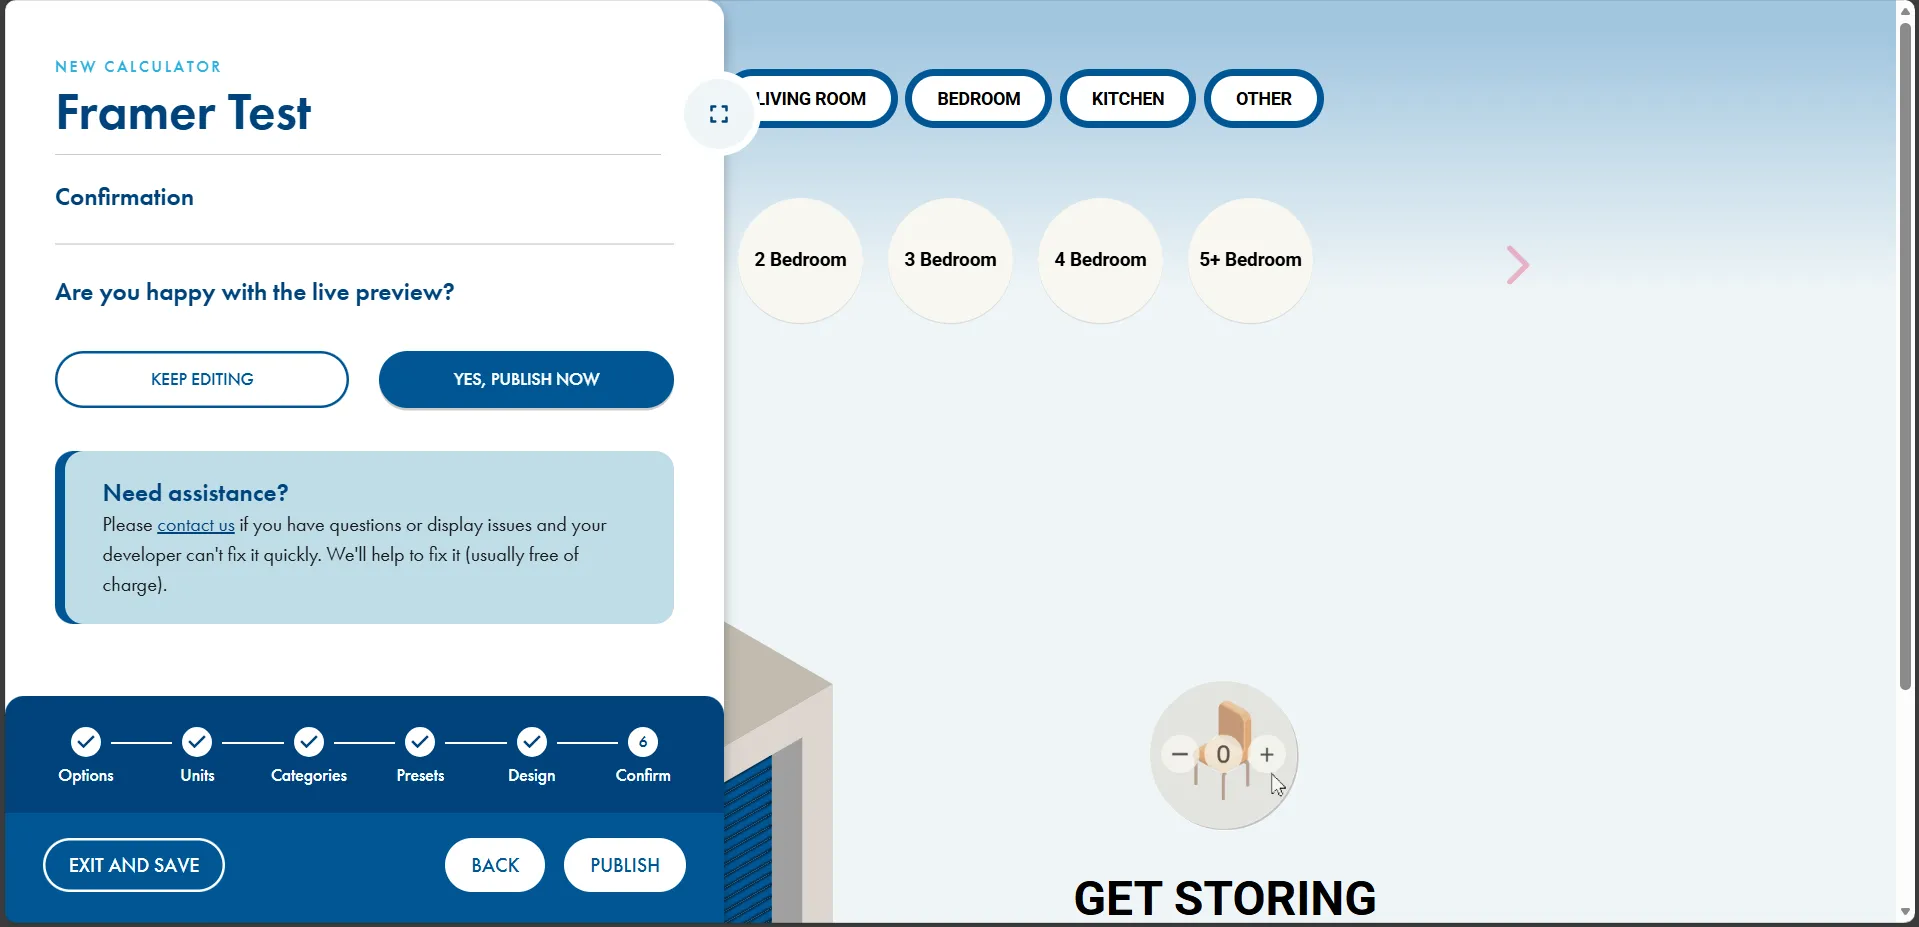
Go to the ‘confirm’ step on your calculator and press ‘Yes, publish now’.
-
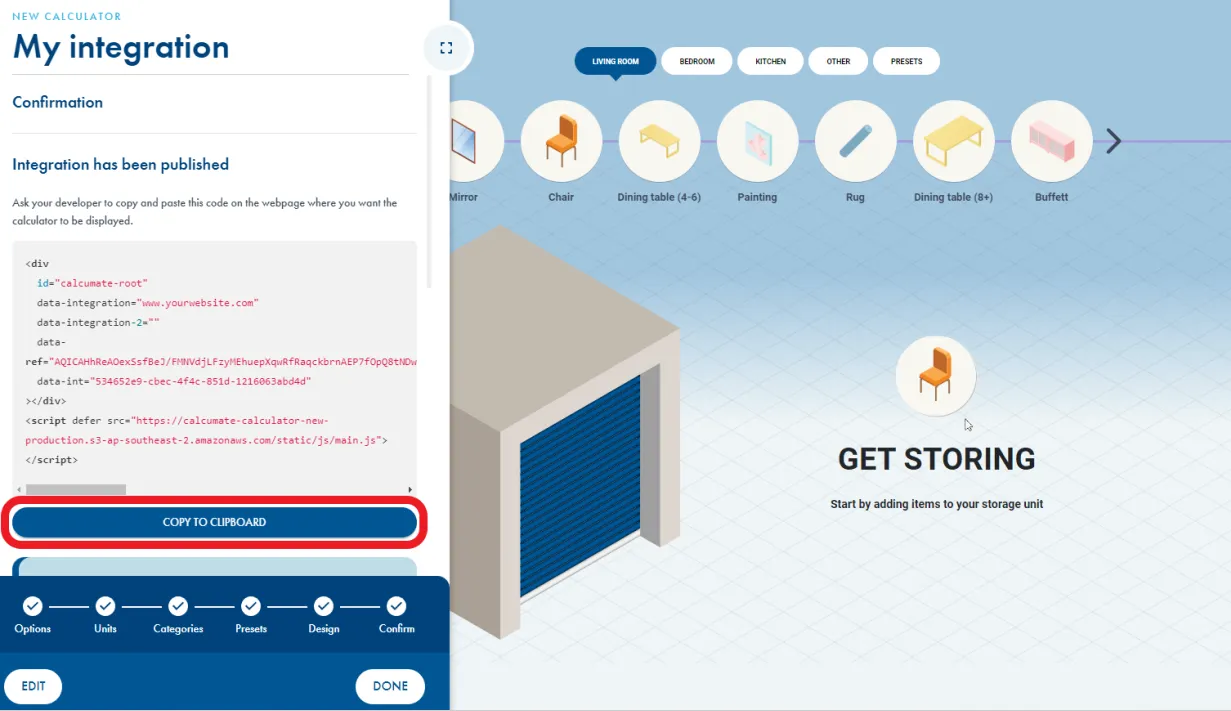
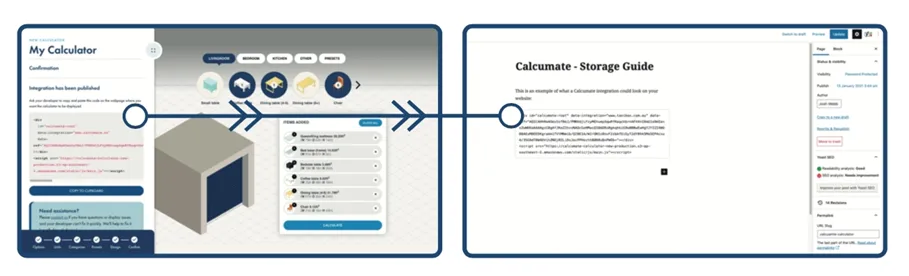
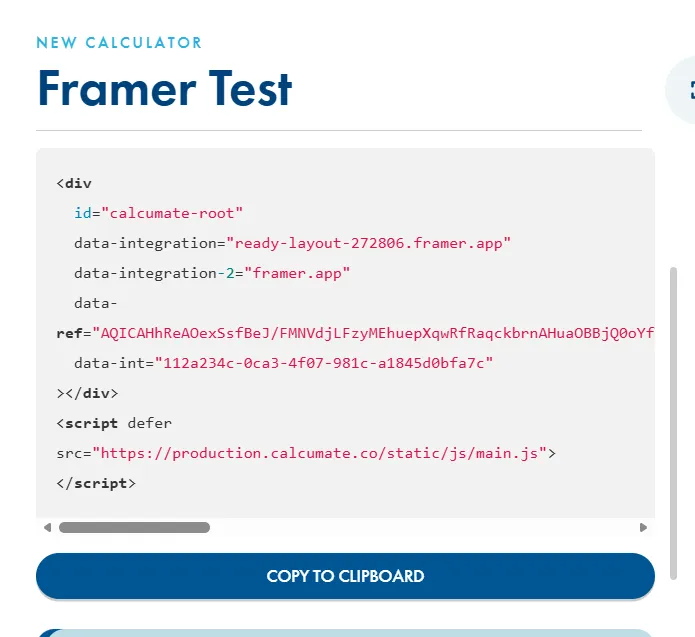
Press ‘copy to clipboard’ and paste the code onto any page of your websites domain (it can be added to multiple pages within the sames domain).
If you’re using a website editor, you will want the ‘custom html’ or ‘embed code’ option.
Alternatively, if you’re not using a website editor, a developer should be able to simply paste this code to the designated page.Note: we recommend pasting this code directly from the ‘copy to clipboard’ to prevent the code reformatting.
-
Need to make changes to your integration? No problem, simply login to your account and make any changes that you need. Your website will automatically saves and updates as you make the changes in your dashboard.
Embedding with iframes
Section titled “Embedding with iframes”If you’re adding your integration through web editors like Wix or GoDaddy, then your Calcumate integration will likely be added inside an iframe.
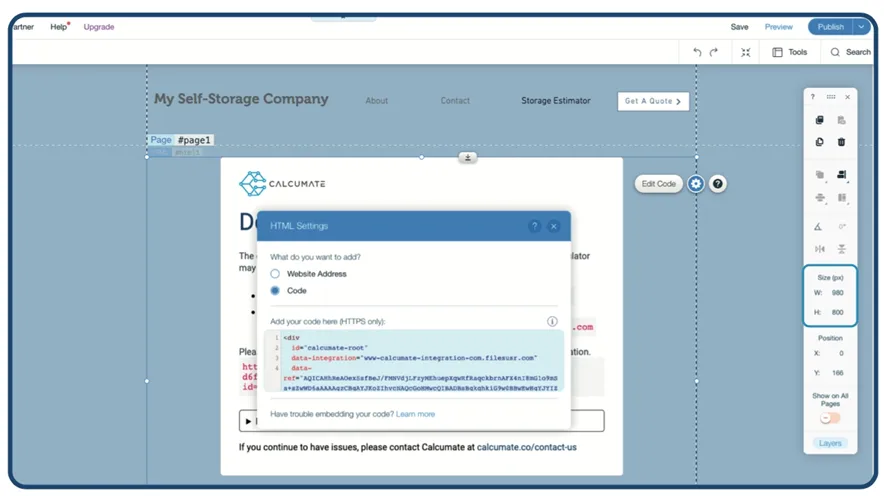
This shouldn’t impact the performance of either your website or your Calcumate integration, but you may need to manually set the height and width of the iframe in order for it to appear correctly on your website.
Importantly, you’ll need to set the dimensions for both desktop and mobile devices.
We recommend:
Desktop: 980px x 800px
Mobile: 350px x 850px
Domain Mismatch Error
Section titled “Domain Mismatch Error”This error message appears when the domain set for your Calcumate integration doesn’t match the one your integration has been embedded onto. Commonly this is because of either a spelling mistake or because of the way our database reads your domain.
Either way, the good news is there’s a simple solution.
- Copy the URL that our error message has recommended.
- Login to your Calcumate account and paste the URL in step 1 of the integration builder. The website URL in options 1 should match the domain you’re pasting your code.
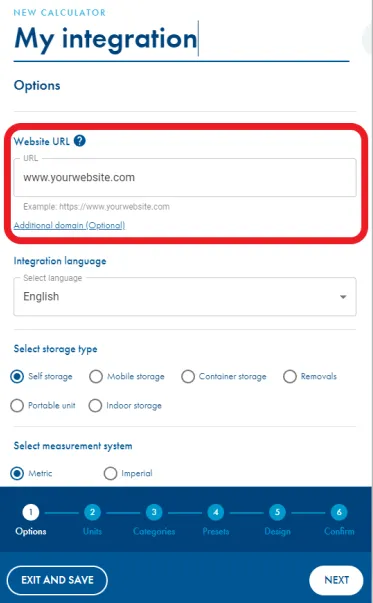
- Continue through the steps and re-publish your new integration code snippet.
- Copy this new integration and use it to replace the existing code on your website.
- Go to the right page and clear your cache, before completing a hard refresh of your browser
How to integrate Calcumate to Framer
Section titled “How to integrate Calcumate to Framer”Step 1: Create a Calculator
- Start by creating a new calculator from your Calcumate dashboard (login here if you haven’t already).
- You can also copy an existing calculator if you’ve already set one up before.
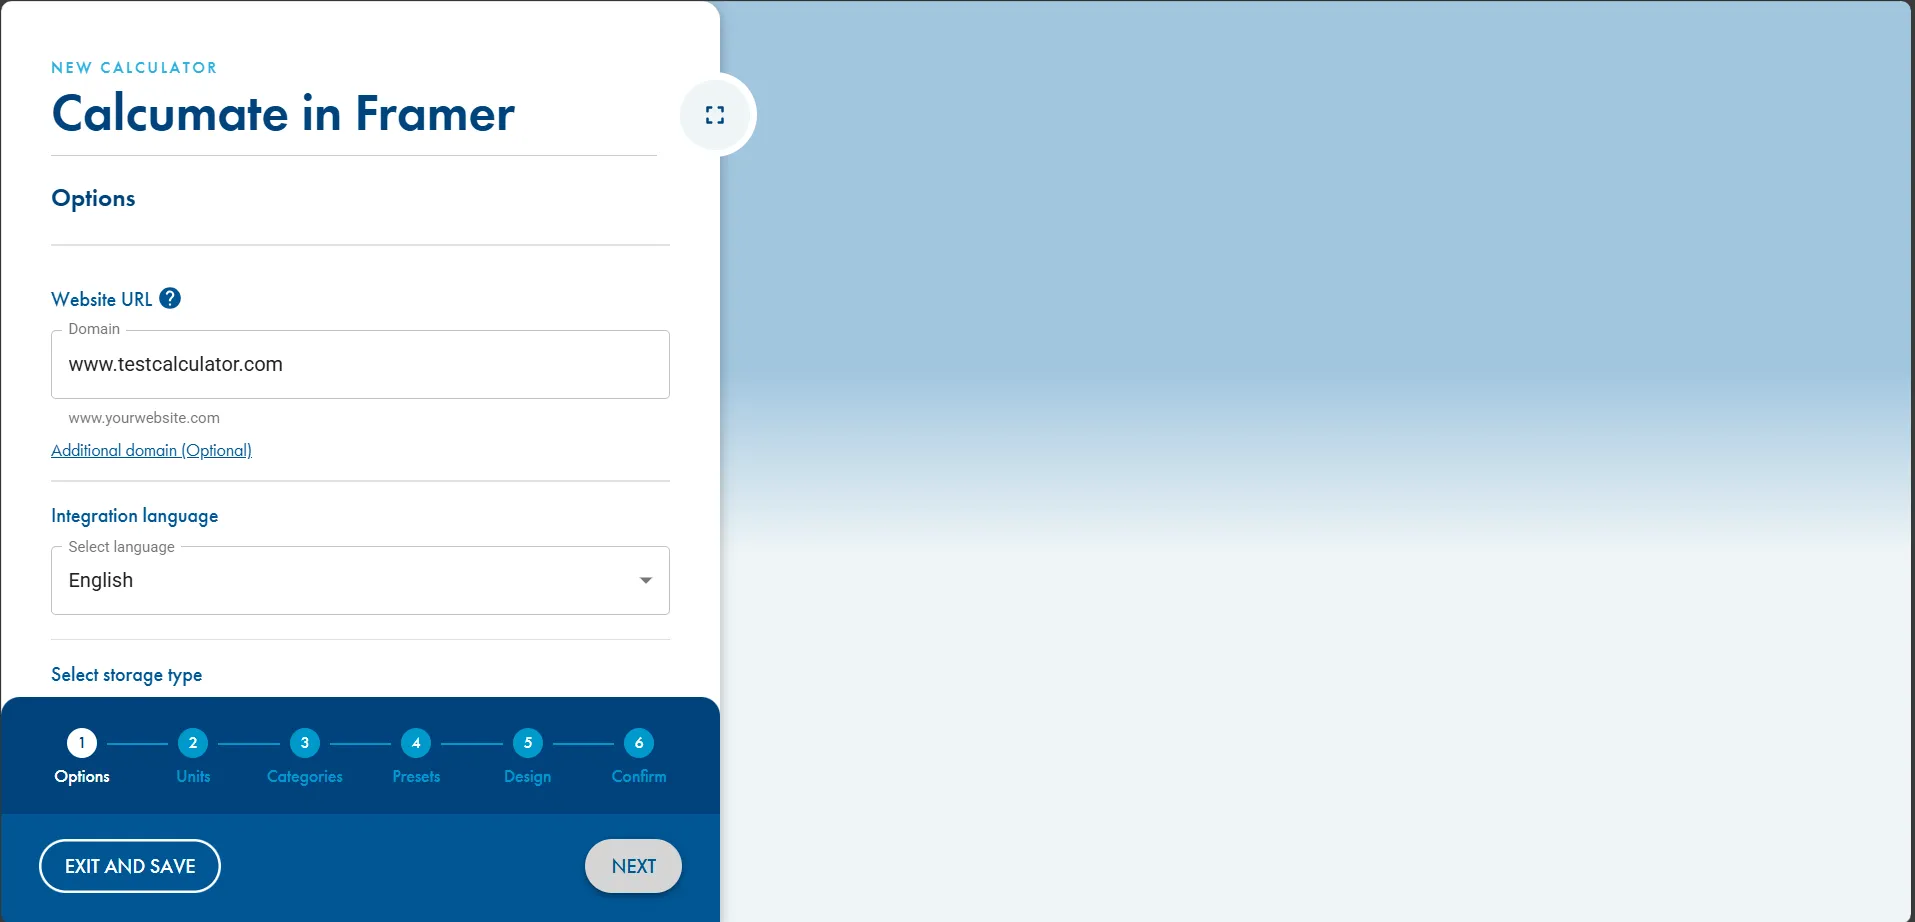
Step 2: Publish the Calculator
- Go to the Confirm step.
- Click Publish to generate the code snippet.
Step 3: Copy the generated code snippet
Approach 1
Section titled “Approach 1”Step 4: Add the embed
- Go the insert menu, in the “Utility” category find the “Embed” item and drag it to the website.
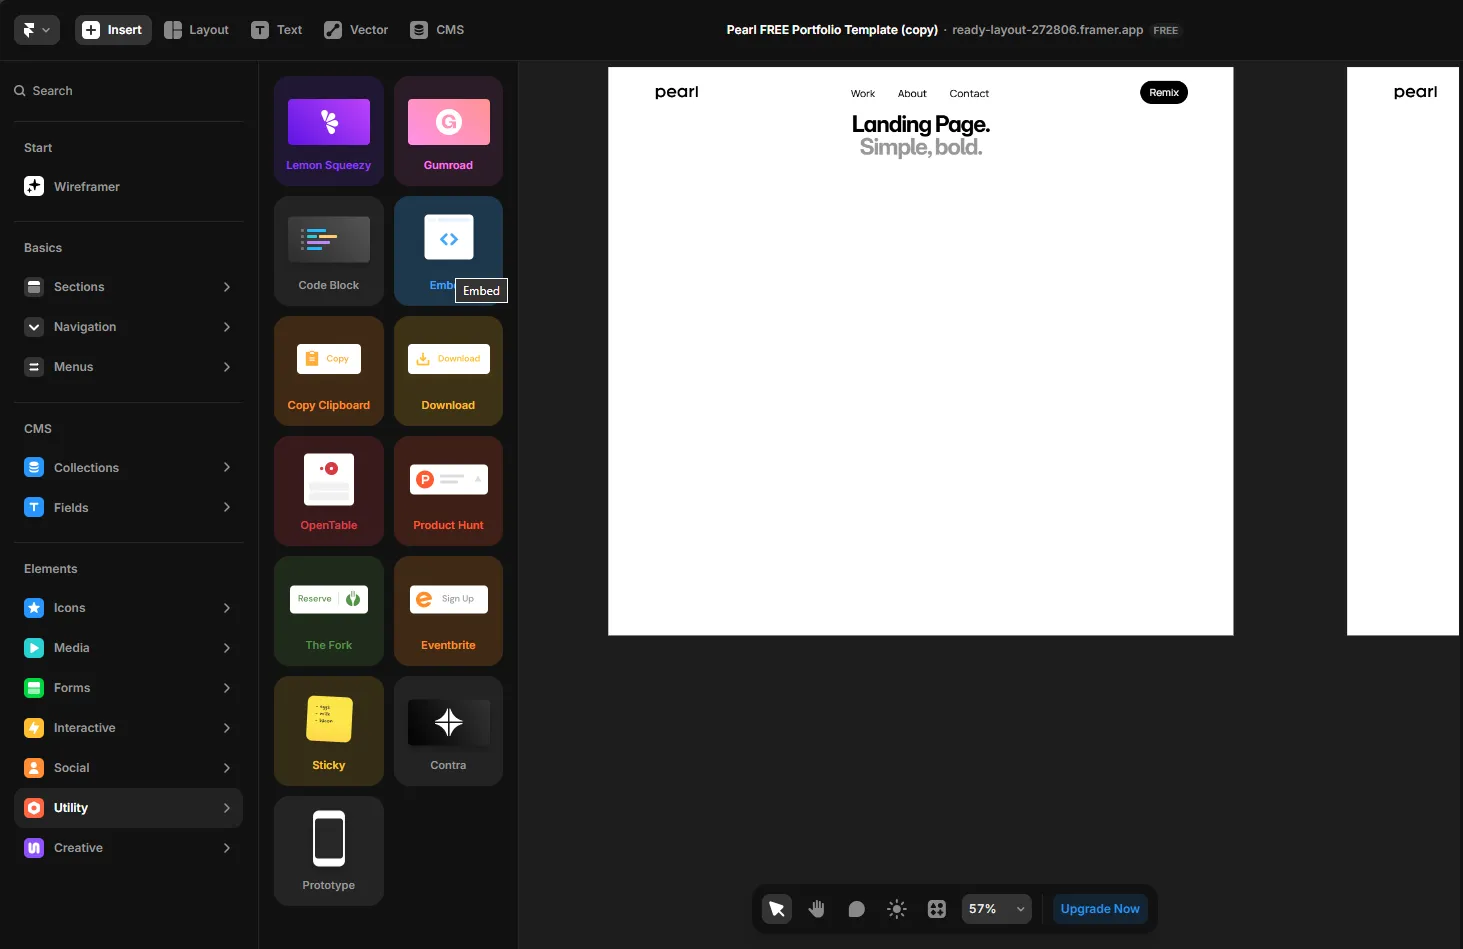
Step 5: Add the generated snippet to the embed
- Select the embed item
- Scroll down on the properties and find the “embed” section
- Click on the HTML button
- Paste the code snippet
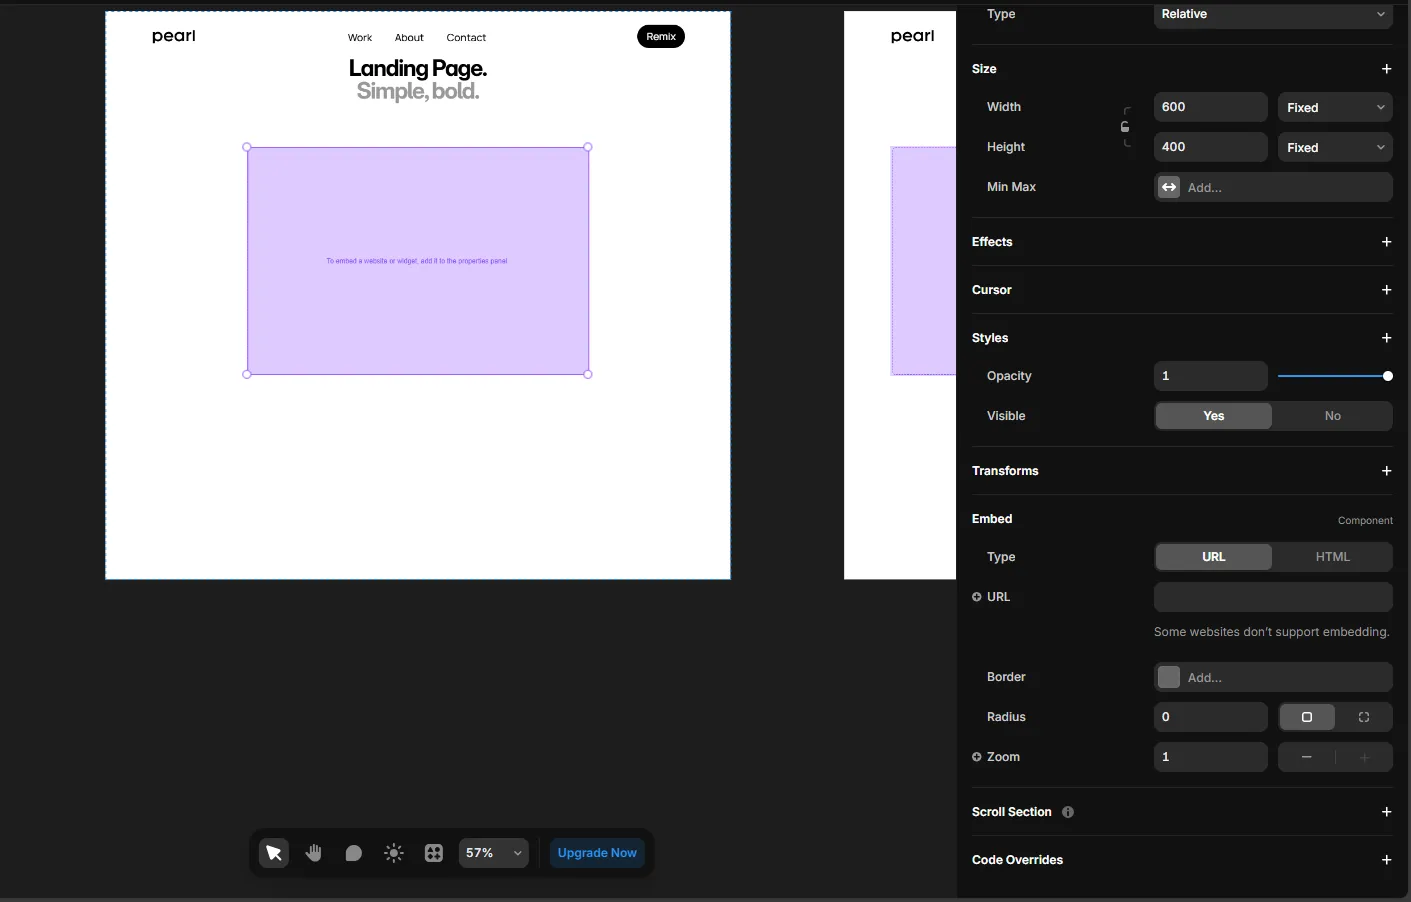
Step 6: Add a style to the code snippet
- In the <div> tag, insert the property style with this value
style="width: calc(100vw - 40px);max-width: calc(100vw - 40px);"
The code snippet should look like this now:
<div id="calcumate-root" data-integration="ready-layout-272806.framer.app" data-integration-2="" data-ref="AQICAHhReAOexSsfBeJ/FMNVdjLFzyMEhuepXqwRfRaqckbrnAHuaOBBjQ0oYfYSZfPPpQhwAAAAgzCBgAYJKoZIhvcNAQcGoHMwcQIBADBsBgkqhkiG9w0BBwEwHgYJYIZIAWUDBAEuMBEEDJFfnjyHj8ipzqKqhAIBEIA/fZFsqE7ThBq1XcFkpUmHAa4sm07+g98Vlyv0XHqZdaAvxWx+GDSwGfVXySu6deP1uBaczPeFHD6ayG6d4N3P" data-int="112a234c-0ca3-4f07-981c-a1845d0bfa7c" style="width: calc(100vw - 40px);max-width: calc(100vw - 40px);"></div><script defer src="https://production.calcumate.co/static/js/main.js"></script>Step 7: Publish/Update your website
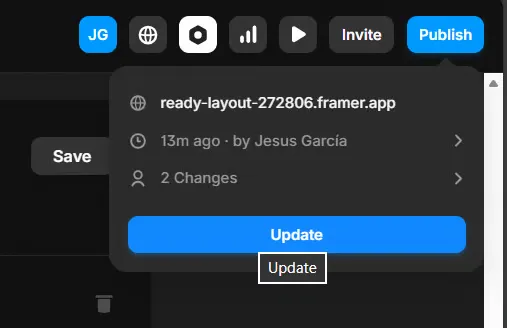
Approach 2
Section titled “Approach 2”Step 4: Add the code to framer
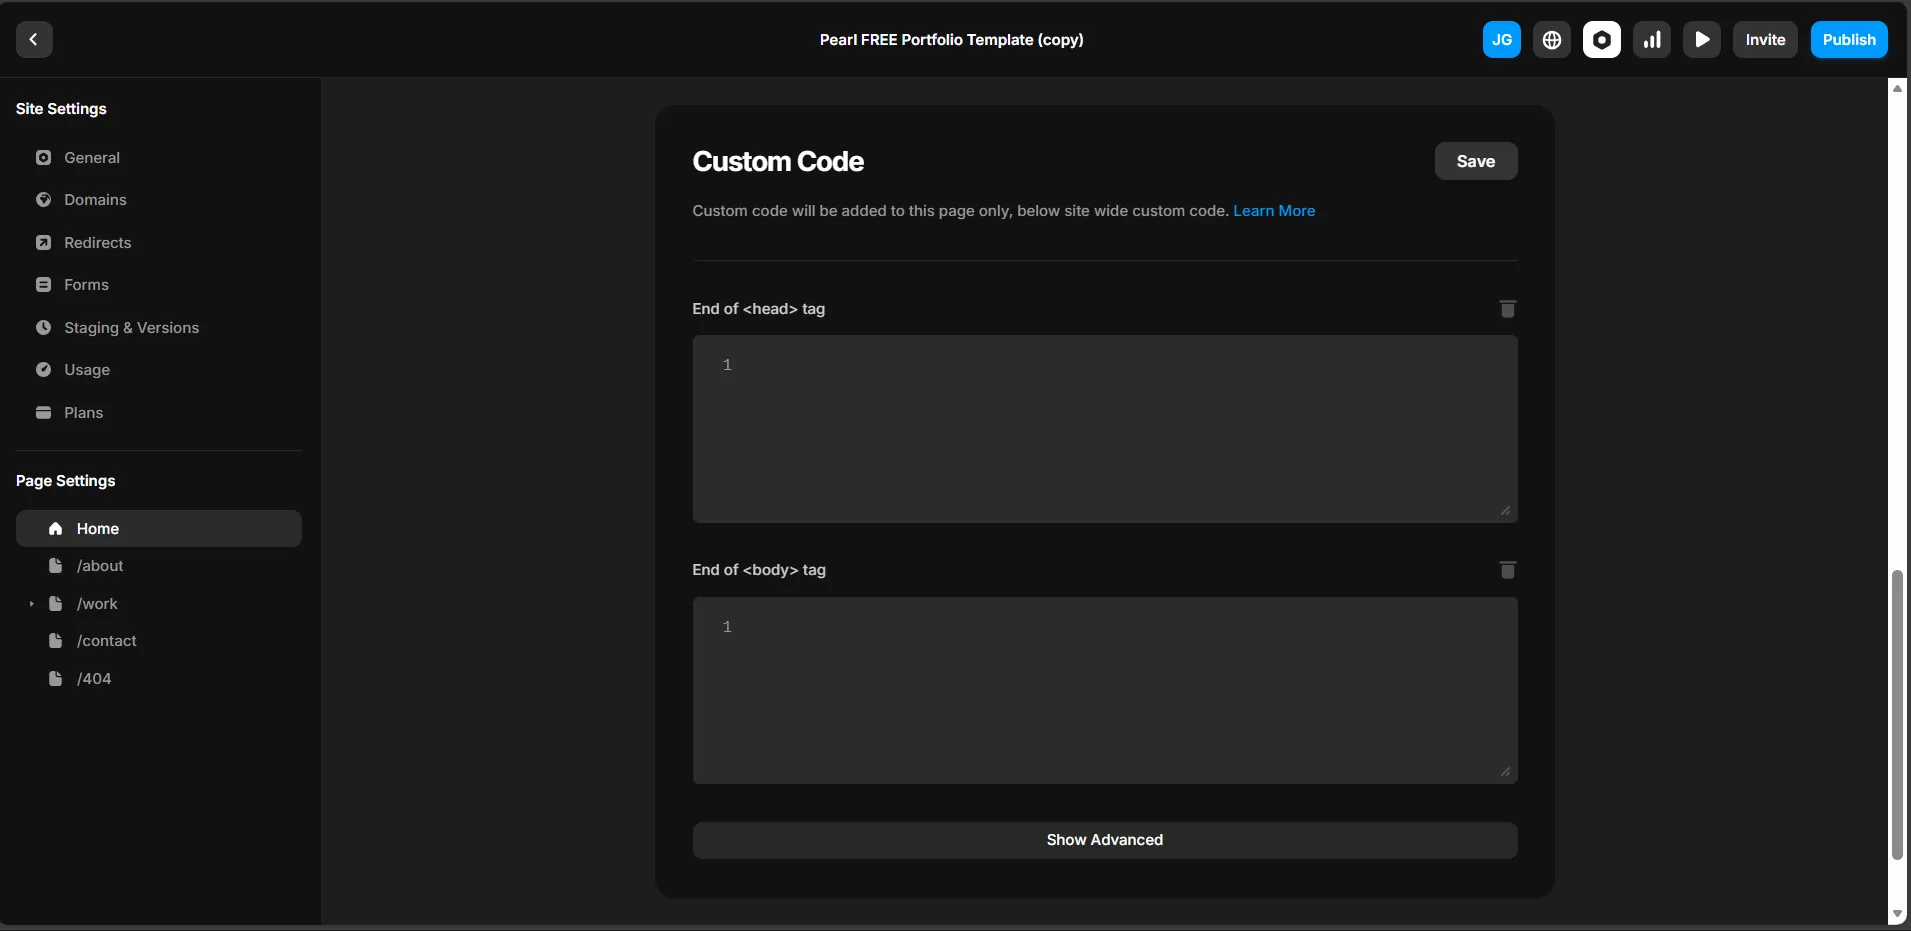
- On the edit view, click on the settings button
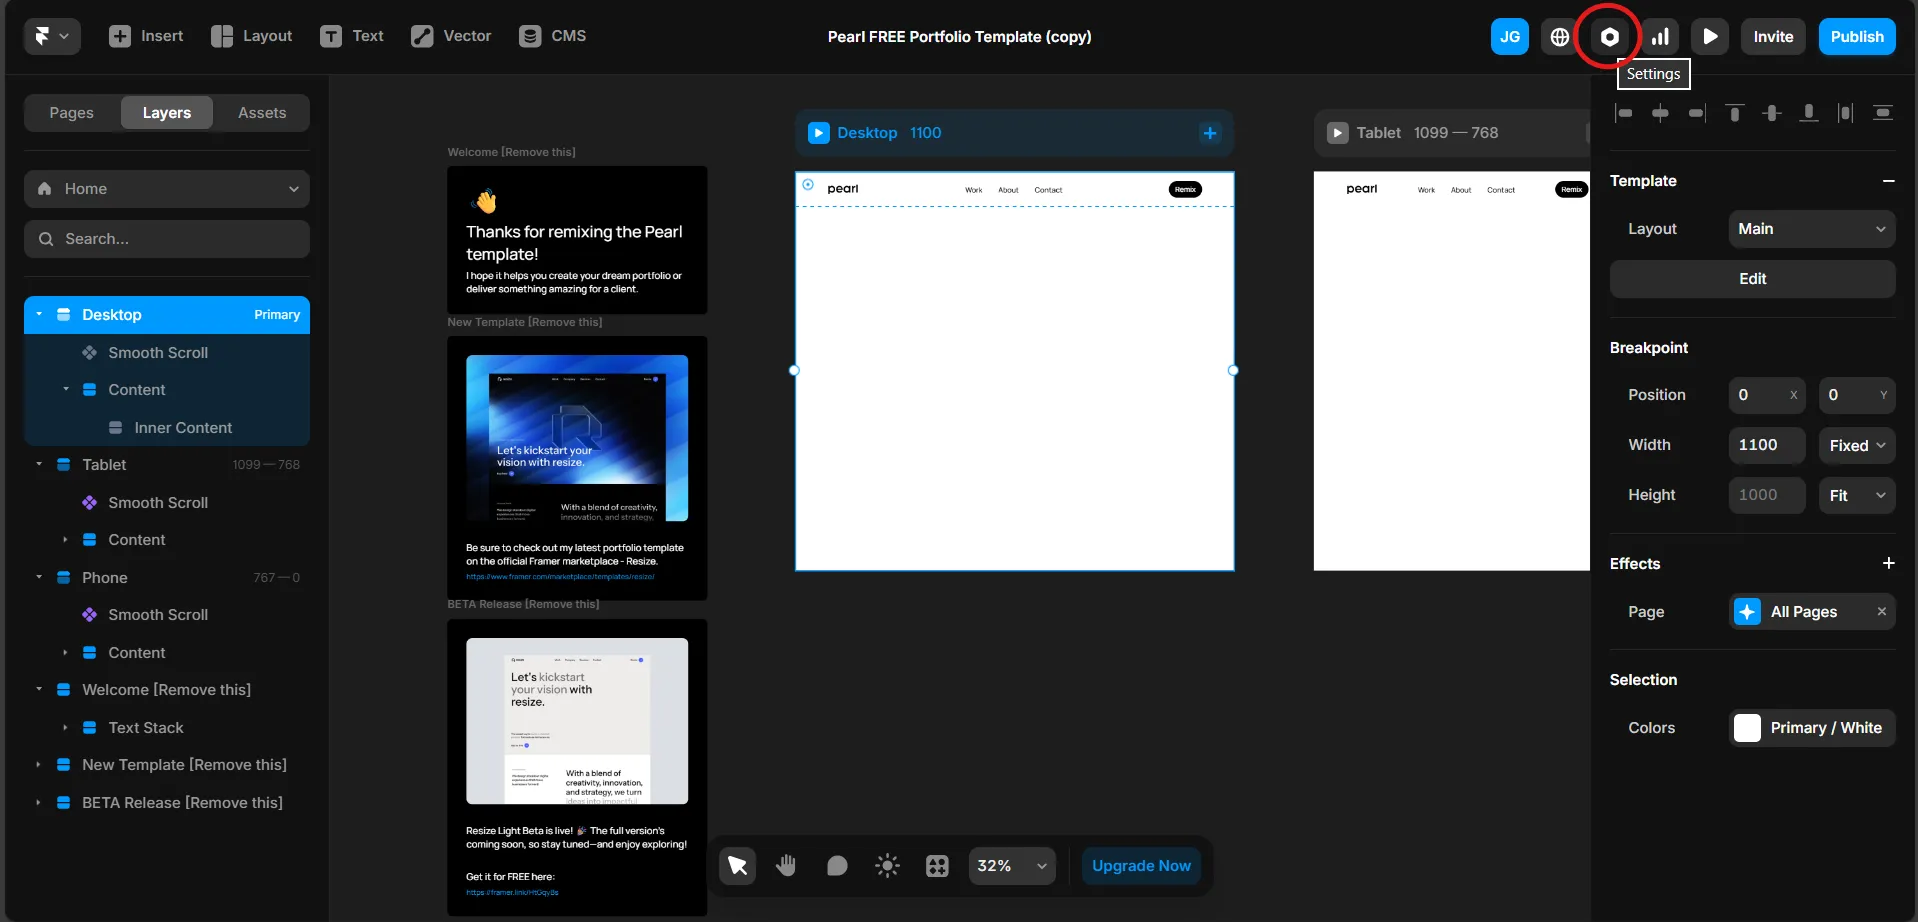
- Select the page in which you want to embed the calculator and scroll down to the “custom code” section and paste in “End of <body> tag” or click in the “show advanced option” and paste it in “Start of <body> tag”.
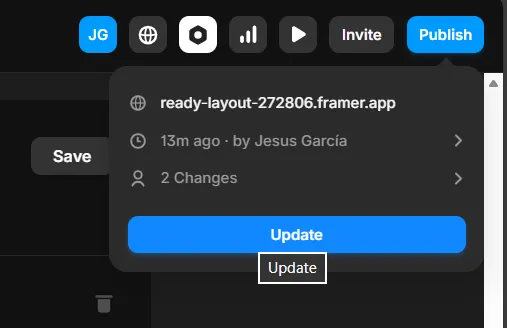
Step 4: Publish/Update your website
How to integrate Calcumate to Wix
Section titled “How to integrate Calcumate to Wix”Step 1: Create a Calculator
- Start by creating a new calculator from your Calcumate dashboard (login here if you haven’t already).
- You can also copy an existing calculator if you’ve already set one up before.
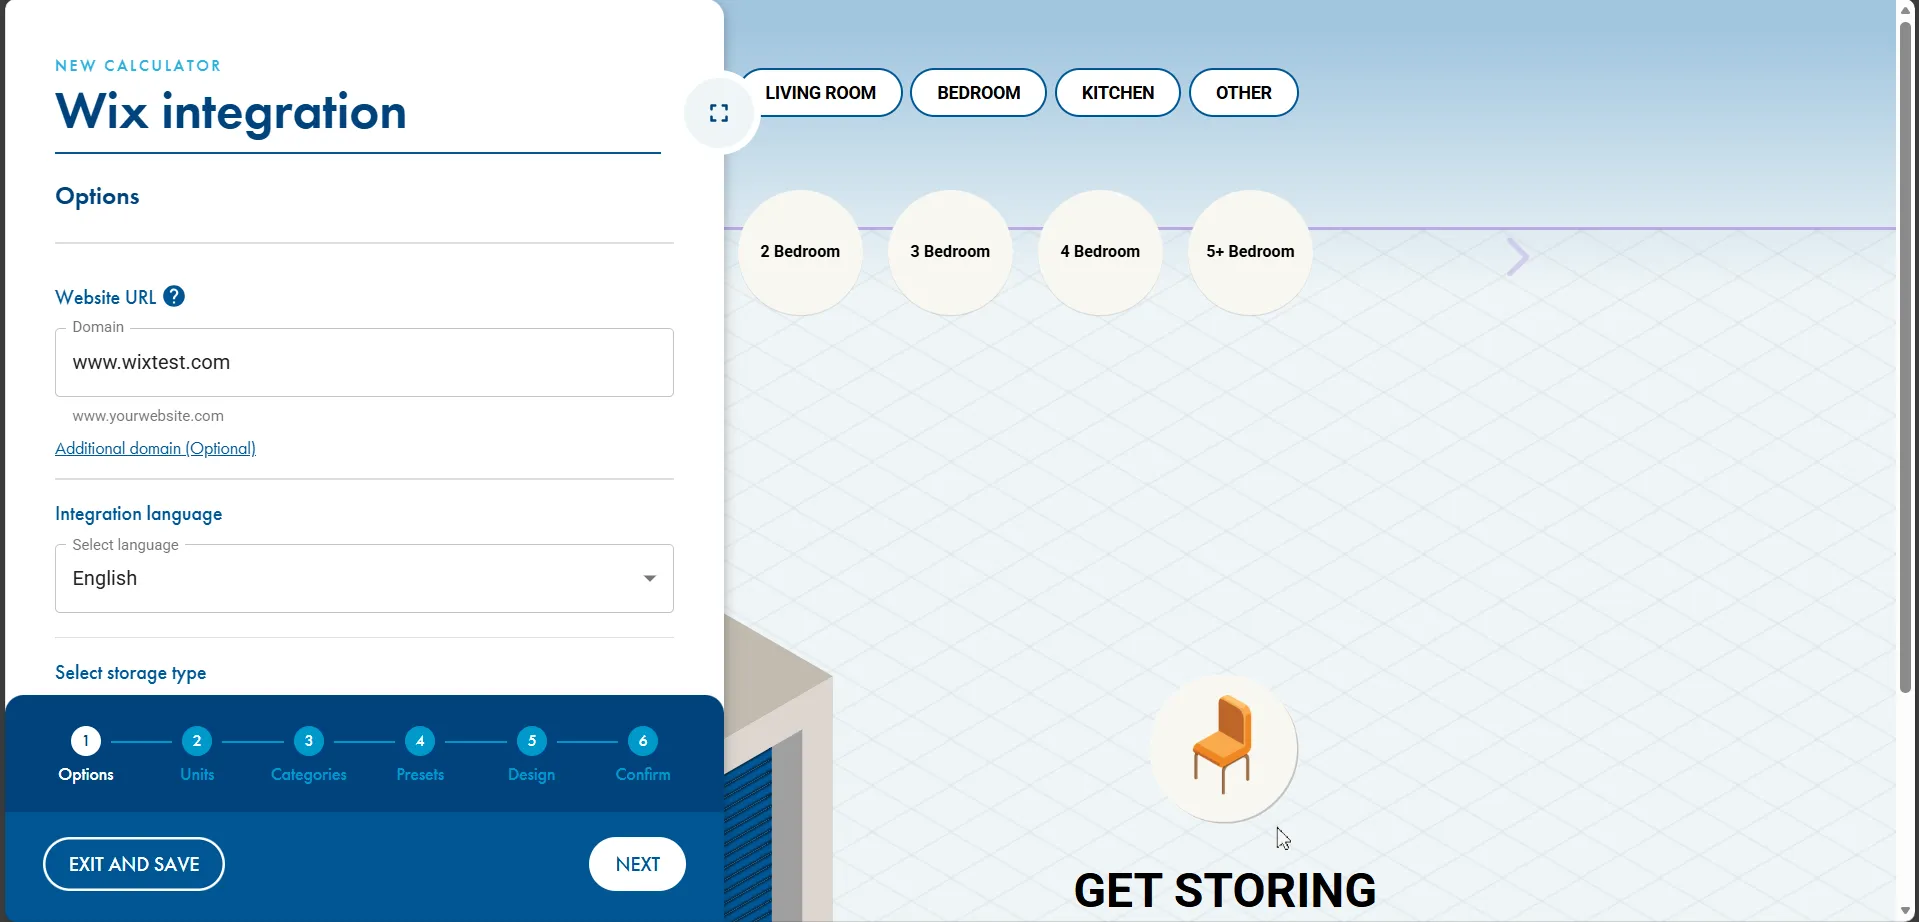
Step 2: Publish the Calculator
- Go to the Confirm step.
- Click Publish to generate the code snippet.
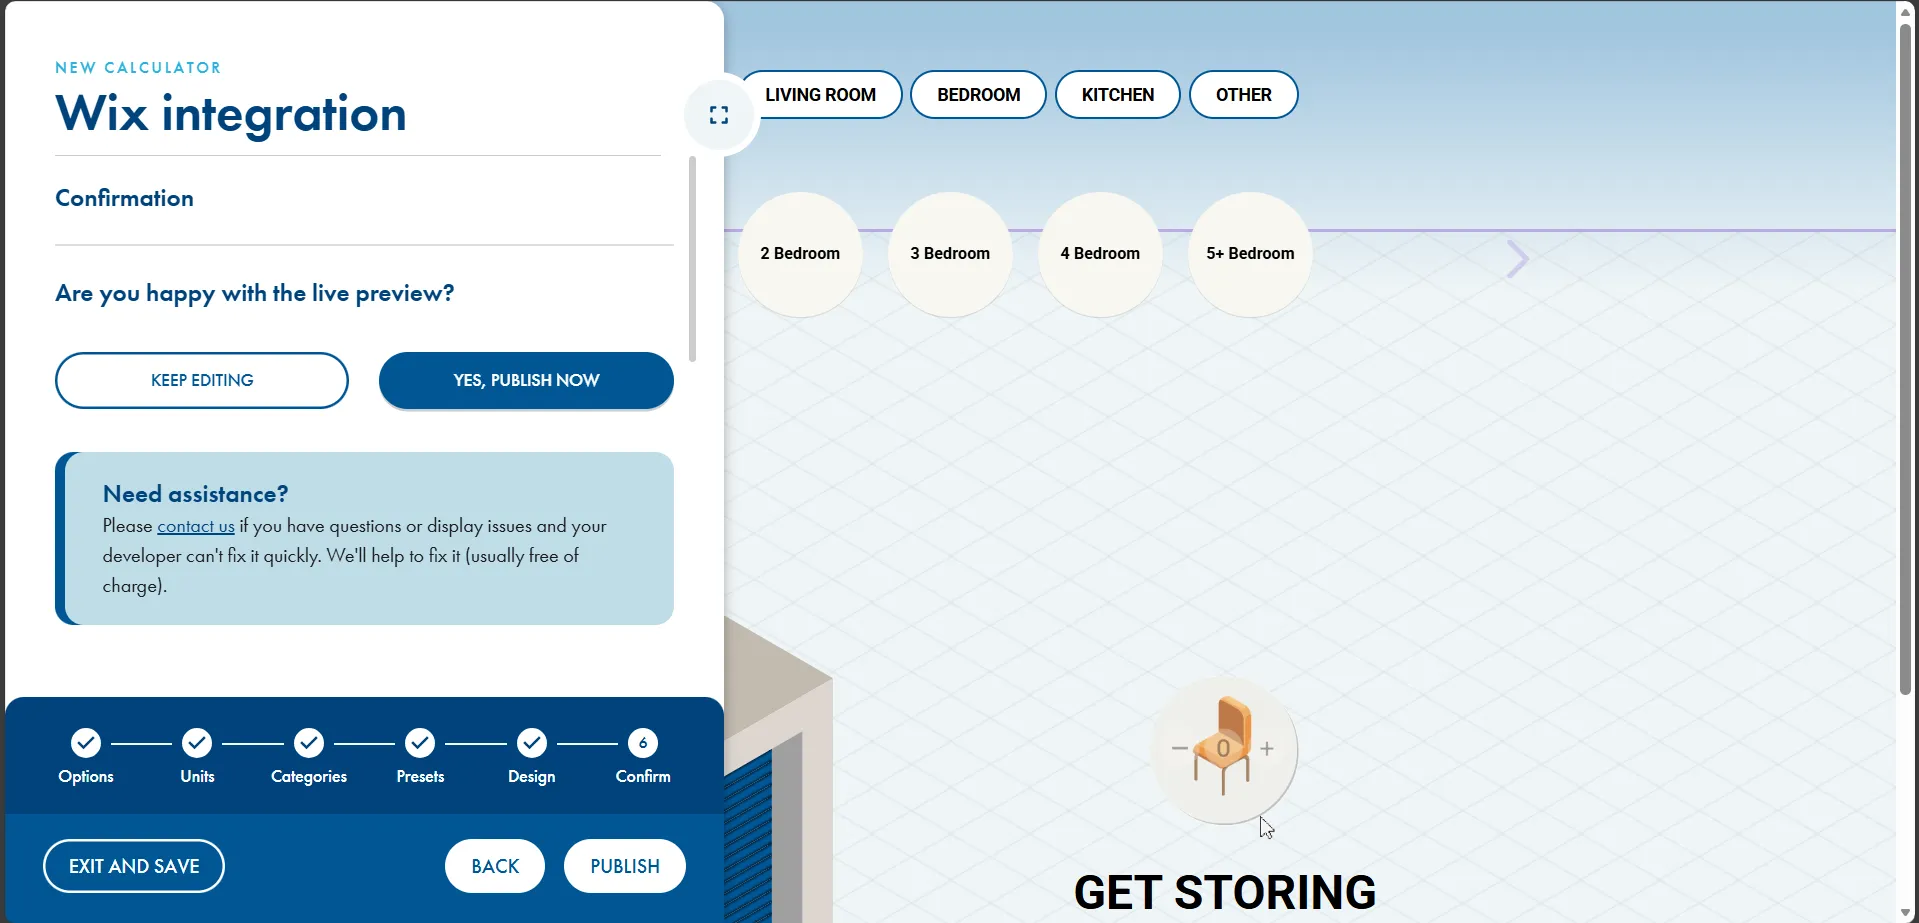
Step 3: Copy the generated code snippet
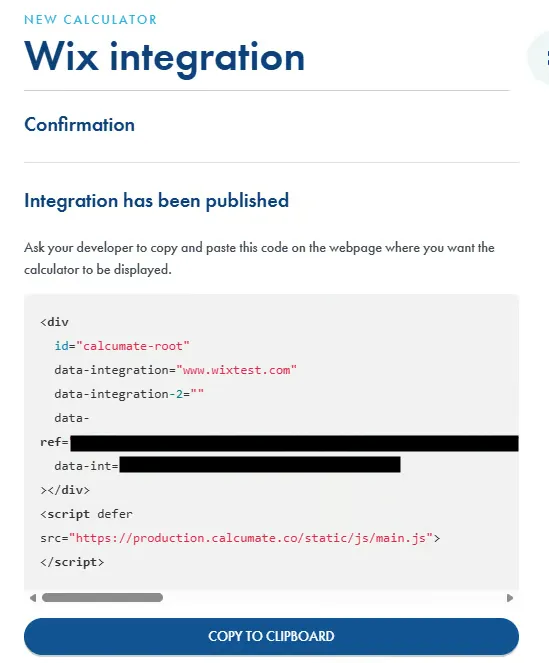
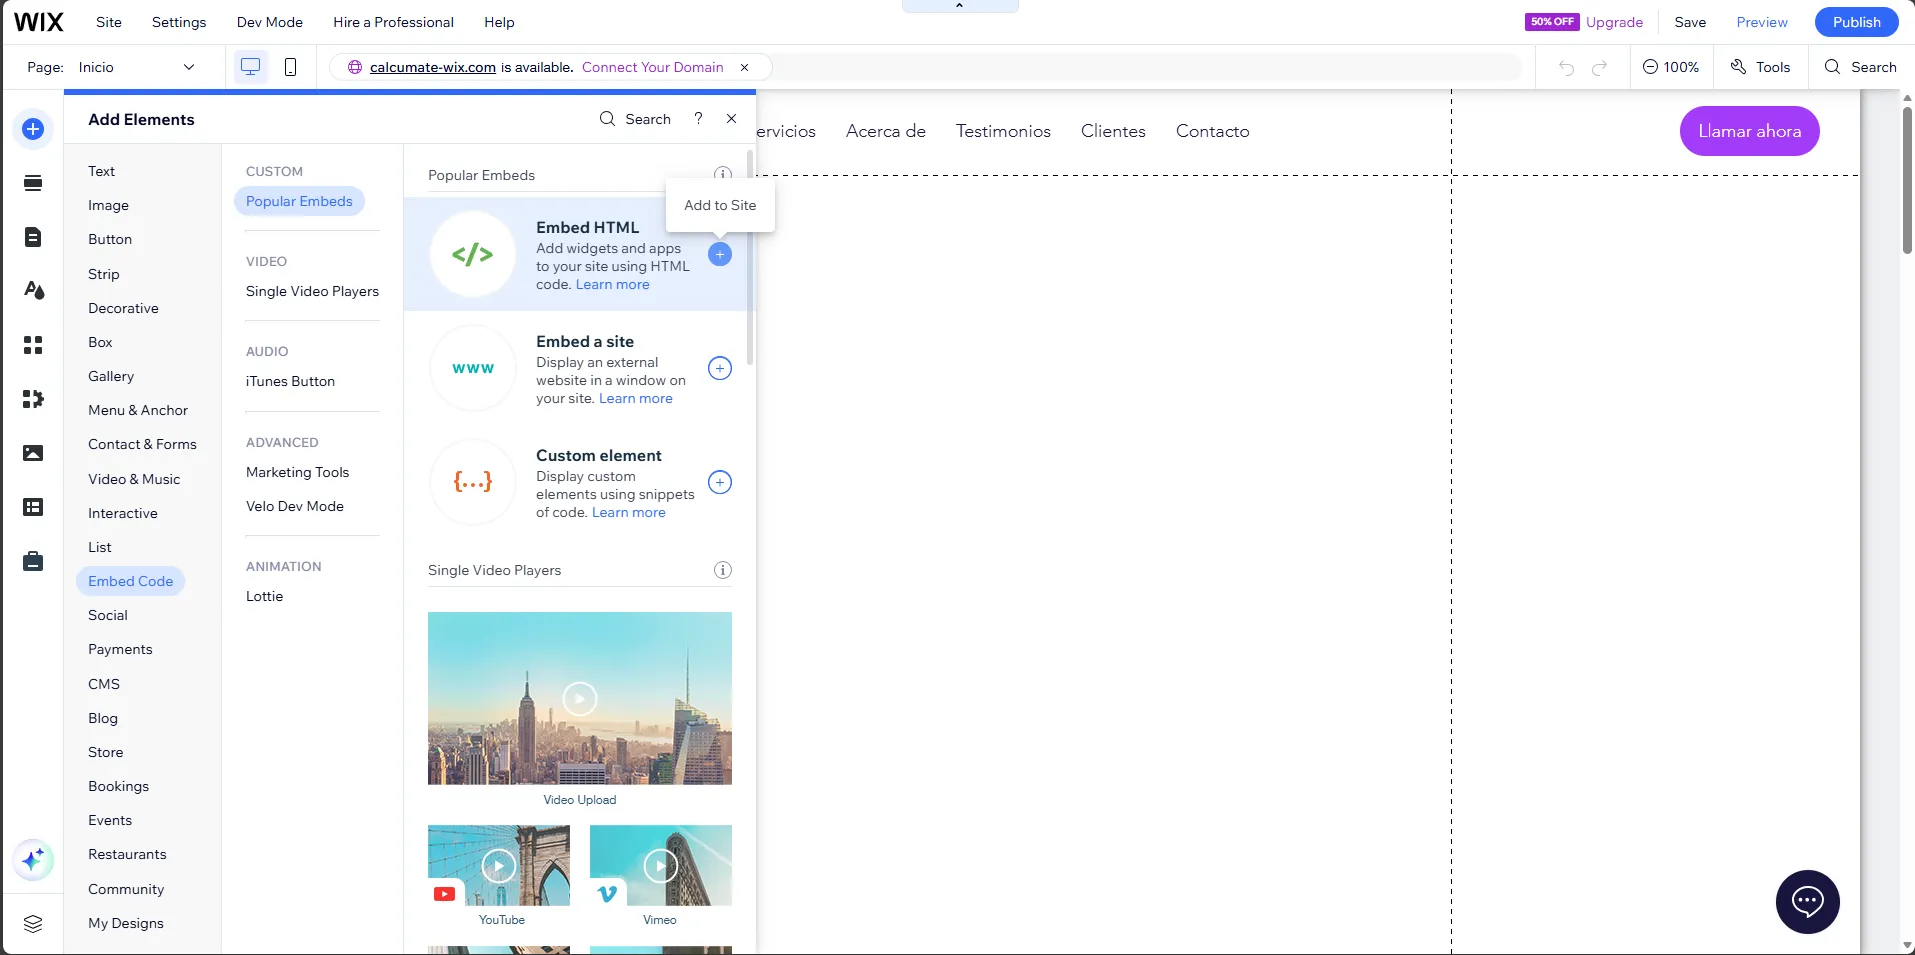
Step 4: Add the embed element
- On the edit view, click on the “add elements” button, find the “Embed Code” category and select “Embed HTML”
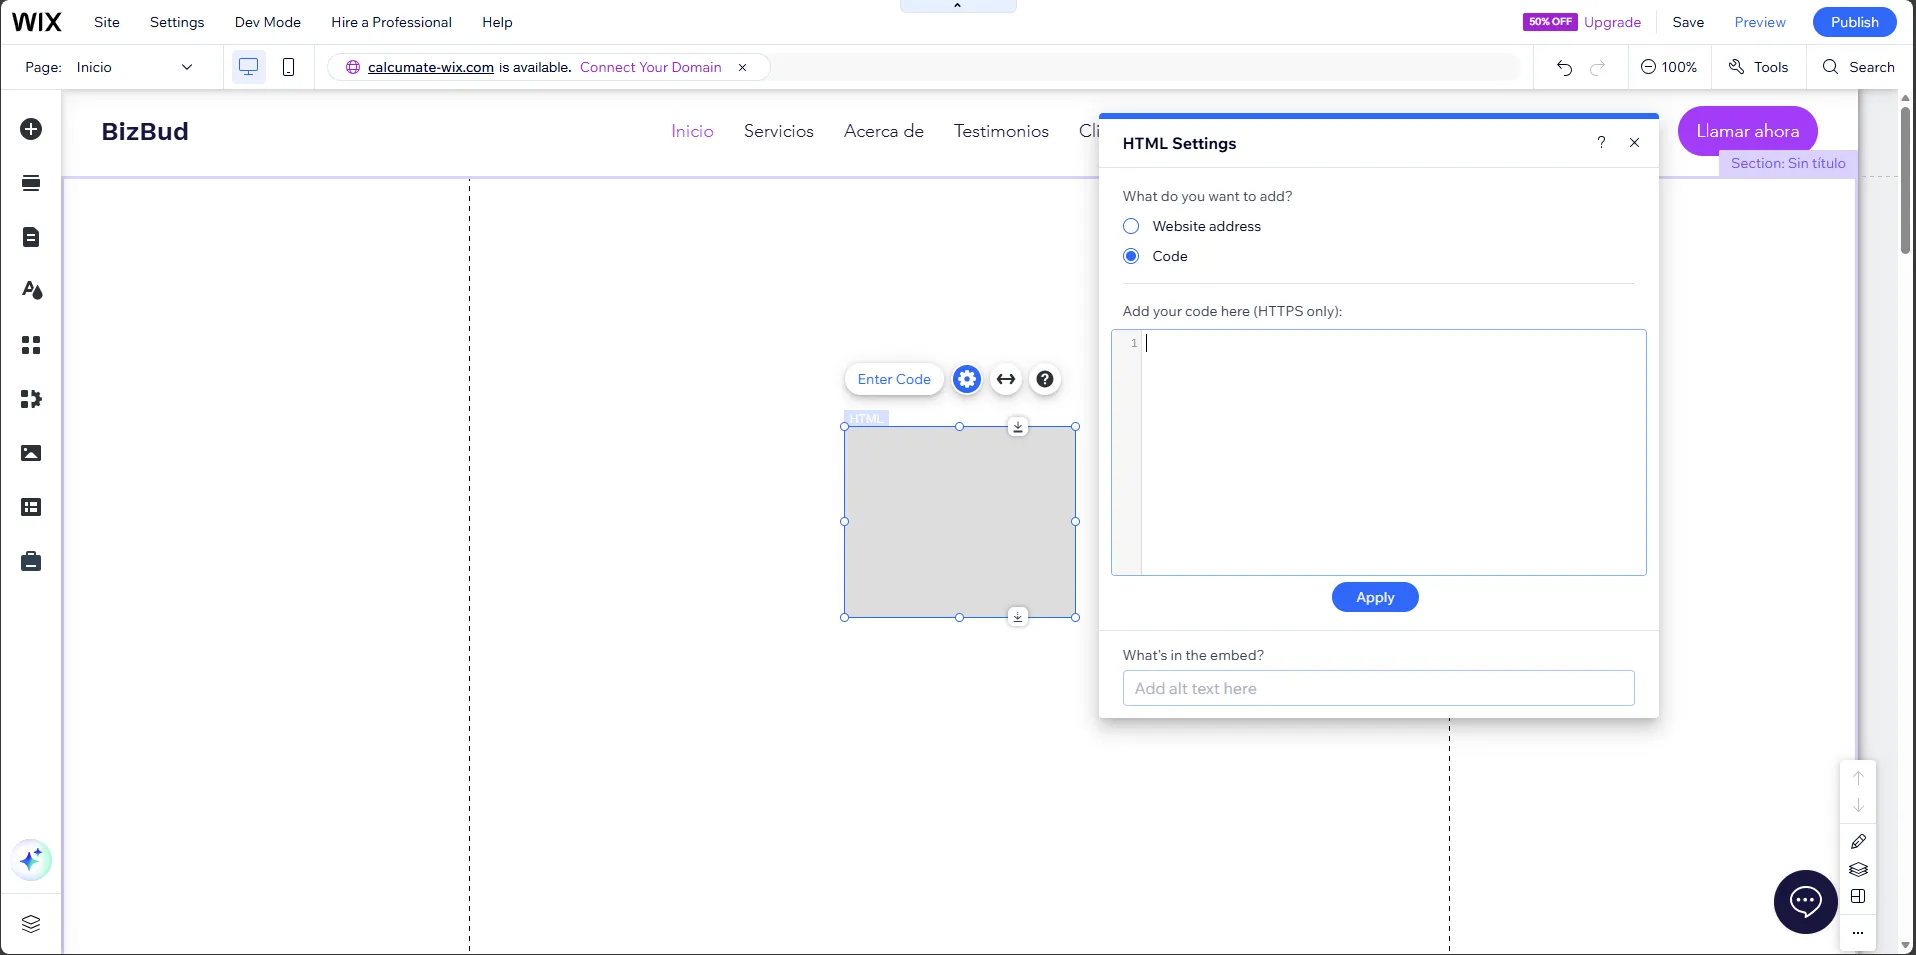
Step 5: Configure the embed
- Select the embed
- Select the “code” option (if not selected)
- Paste the code snippet generated on step 3
- Click on “apply”
Step 6: Adjust the embed dimensions
- At the top of the last-step code we need to paste this style tag
<style> #calcumate-root { width: 100% !important; height: 1500px; overflow: none; } @media (min-width: 1024px) { #calcumate-root { height: auto !important; min-height: 700px; } }</style>This will help to set the dimensions of the calculator on desktop and mobile view. The code should now look as this:
<style> #calcumate-root { width: 100% !important; height: 1250px; overflow: none; } @media (min-width: 1024px) { #calcumate-root { height: auto !important; min-height: 700px; } }</style><div id="calcumate-root" data-integration="www.wixtest.com" data-integration-2="" data-ref="<your-data-ref>" data-int="<your-data-int>"></div><script defer src="https://production.calcumate.co/static/js/main.js"></script>Step 7: Publish/Update your website
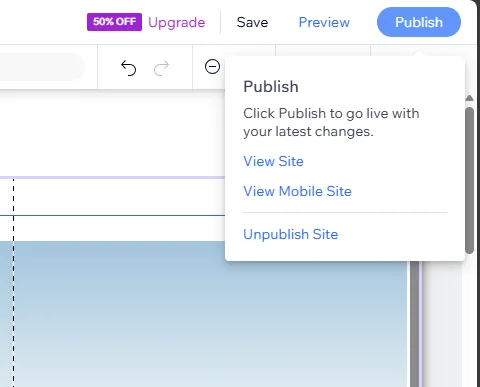
- On the top-right corner click on the publish button and select your configuration